How Can We Help?
Quick start
Preparation
System requirement
The Inspector can be installed and used on an iPad or iPhone (iOS operating system), and the recommended system configurations are outlined below:
|
Device |
Minimum Configuration |
Recommended configuration |
|
iPhone |
System: iOS 14 |
System: iOS 17 |
|
RAM: 4GB |
RAM: 6GB |
|
|
Chip: A12 |
Chip: A16 |
|
|
iPad |
System: iPadOS 14 |
System: iPadOS 16 |
|
RAM: 3GB |
RAM: 16GB |
|
|
Chip: A12 |
Chip: M2 |
Note: It is recommended to use 16GB or more of RAM to avoid forced application shutdowns due to insufficient memory.
Download and installation
You can download and install DataMesh Inspector from the Apple Store.
Download address: Apple Store
Account permission
To gain access to DataMesh FactVerse and use DataMesh Inspector, you need to contact your company’s administrator and request authorization. The administrator will assign you appropriate permissions based on your role and needs to ensure smooth access to DataMesh Inspector and related services. Once authorized, you can log into DataMesh Inspector and start using it.
Login
DataMesh Inspector supports various login methods, including standard login, third-party login, and QR code login. Depending on your needs, you can select the most suitable login method:
- Regular Login: Suitable for users who have a registered FactVerse account and log in using their FactVerse username and password.
- Third-party login: Ideal for users whose organizations have integrated Microsoft Entra ID, allowing for secure login through a Microsoft account.
- QR Code Login: Best for users who frequently switch devices or environments, enabling quick login by scanning a QR code.
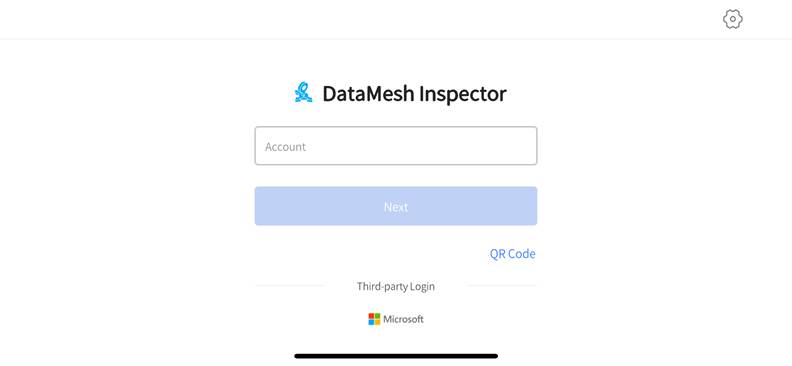
Regular login
On the login interface of DataMesh Inspector, use your account and password to log in.
Steps
1. Open the Login interface of DataMesh Inspector.
2. Press the gear icon to open the setting interface.
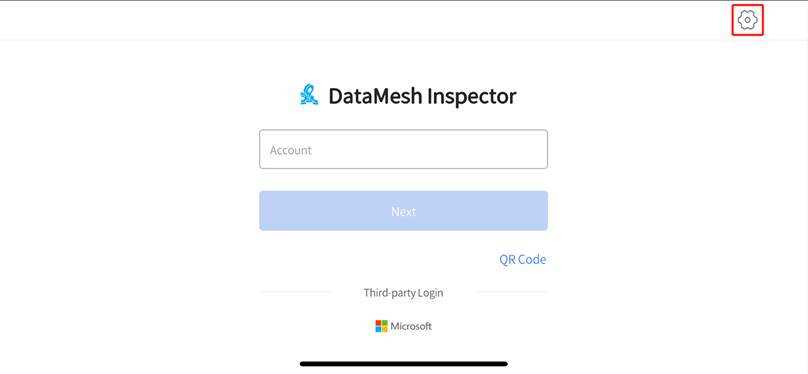
3. Select language in the setting interface.
4. Configure server:
- Select public server: If your company is deployed on a public server, choose the server corresponding to your enterprise account from the list: China, Singapore, or Japan.
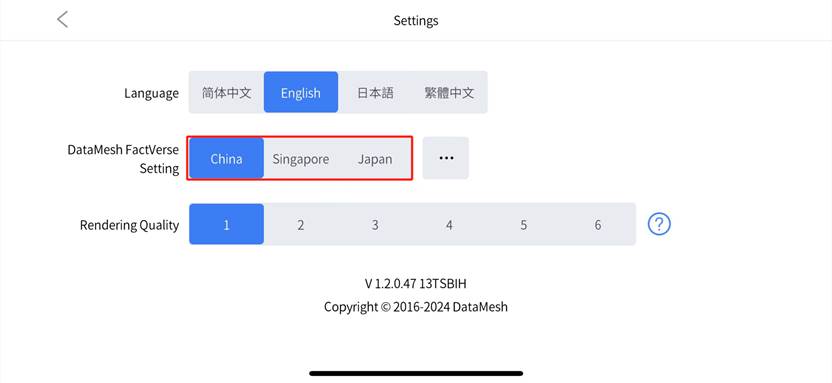
- Set up private deployment server: If your company uses a private deployment server, you will need to set a service code during your first login. The steps to set up a private service code are as follows:
a. Click the more options icon to open the private deployment dialog.
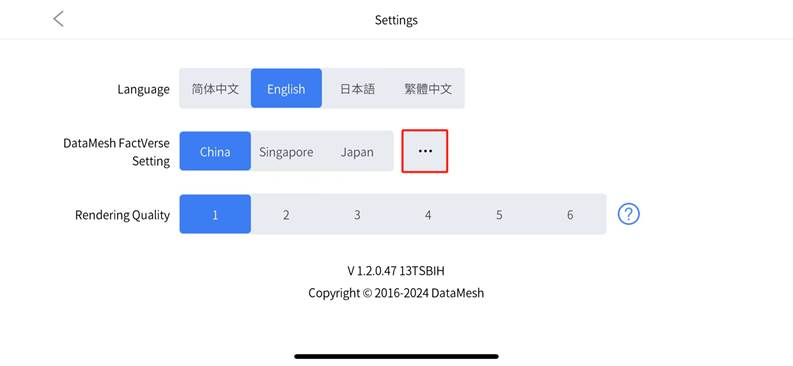
b. In the private deployment dialog, enter your company’s private service code.
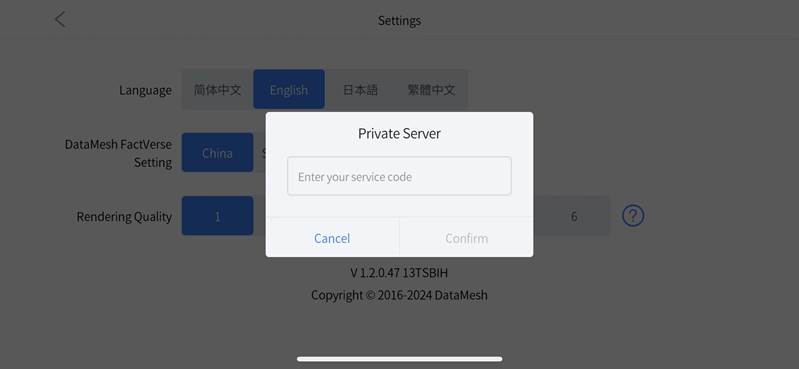
c. Click Confirm to complete the setup.
d. Click < Back to the login interface.
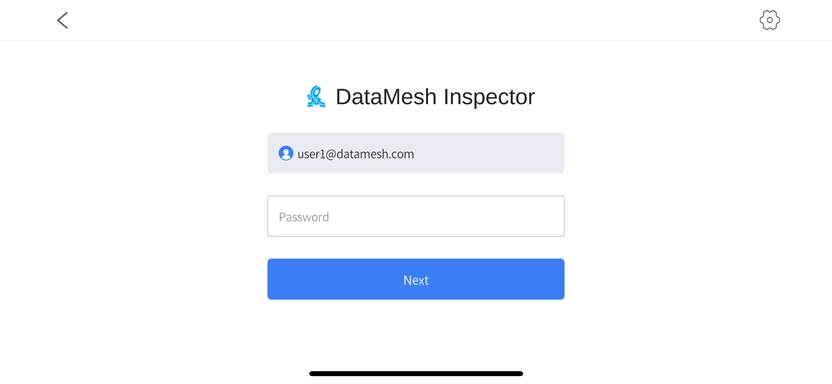
5. Enter your FactVerse user account and click the Next button.
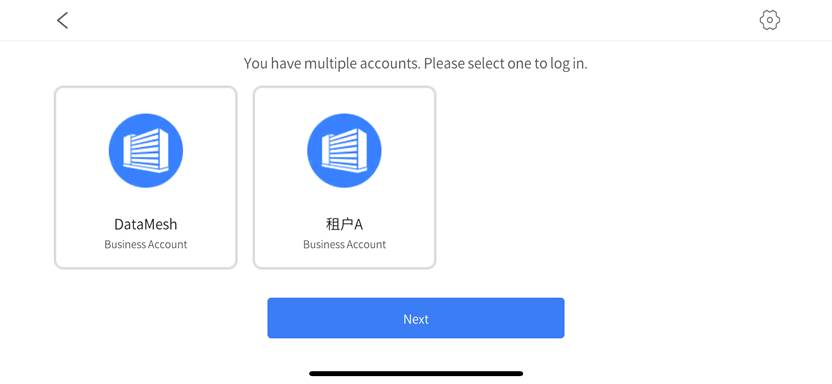
6. Select your company account (optional): If you have multiple company accounts, a list of accounts will be displayed for you to choose from.
7. Enter your password in and click Next to complete the login.
Third-party login
DataMesh Inspector supports third-party login methods, utilizing Microsoft’s identity and access management service, Microsoft Entra ID, to enhance user security while using FactVerse.
Steps
1. Open the Login interface of DataMesh Inspector.
2. Configure language and server.
3. If your company uses a private deployment server, you need to set up a service code before logging in. Please refer to step 4 in the Regular login instructions for specific setup steps.
4. Click the third-party icon ![]() , and then follow the prompts to enter your Microsoft account password to log in.
, and then follow the prompts to enter your Microsoft account password to log in.
QR code login
Use the QR code login feature provided by the FactVerse platform to quickly log in to DataMesh Inspector.
Steps
1. Open the Login interface of DataMesh Inspector.
2. Press the gear icon to open the setting interface. Select the correct language and server.
3. If your company uses a private deployment server, set the service code before logging in. Refer to step 4 in the regular login process for details.
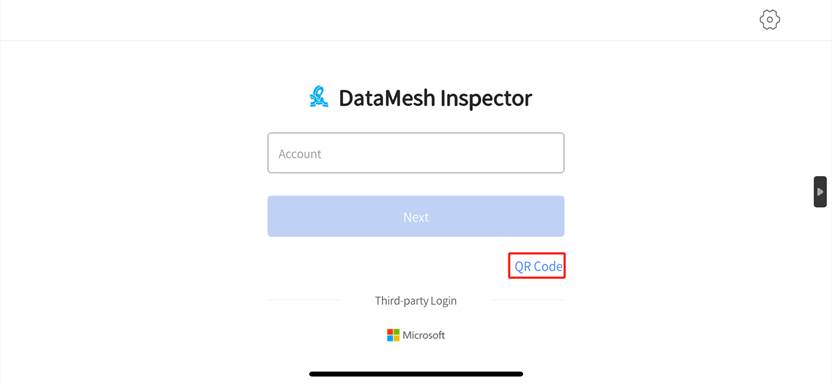
4. Return to the login interface and click QR Code. A scanning box will appear.
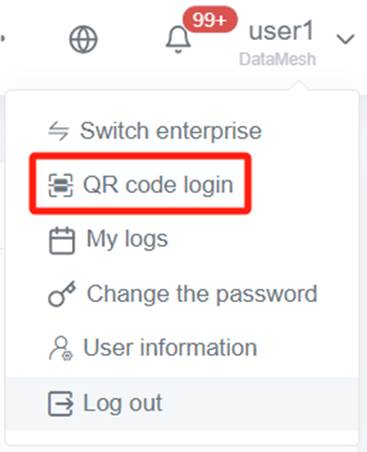
5. Log in to the FactVerse platform, click on your username in the top navigation bar, and select “QR code login” from the account menu. The system will automatically generate a QR code that refreshes periodically.
6. Use DataMesh Inspector to scan the QR code generated in step 5 on the FactVerse platform. A prompt window will appear upon successful scanning.
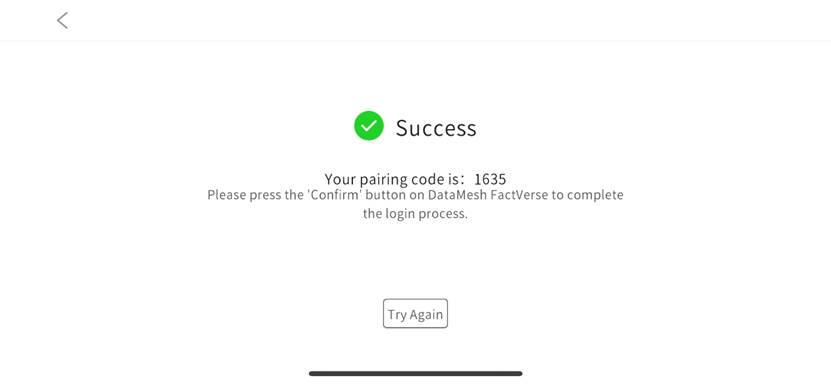
7. In the confirmation window for QR code login on the FactVerse platform, click Confirm to complete the login.

Quick creation and viewing of the architectural scene
We will guide you through the basic process of creating, viewing, and interacting with a scene using the example of the “DM Office,” ensuring you can quickly get started and effectively utilize the features provided by DataMesh Inspector.
Step 1 Build the architectural scene
1. Download the sample file: Download the Sample File for practice and extract the compressed file to a local folder.

The extracted sample file includes two converted BIM files.
2. Upload BIM files: Go to the DataMesh FactVerse Resources page, click Upload, and upload the converted .zip file from the sample files.

3. Create a new architectural scene: Navigate to the BIM Data page under Digital Assets, click New, and create an architectural scene named “Architectural Scene Demo.”

4. Import BIM files: Click the detail button of “Architectural Scene Demo” to enter the scene details page. Click Import on the Resources tab to bring the uploaded BIM file into the scene.

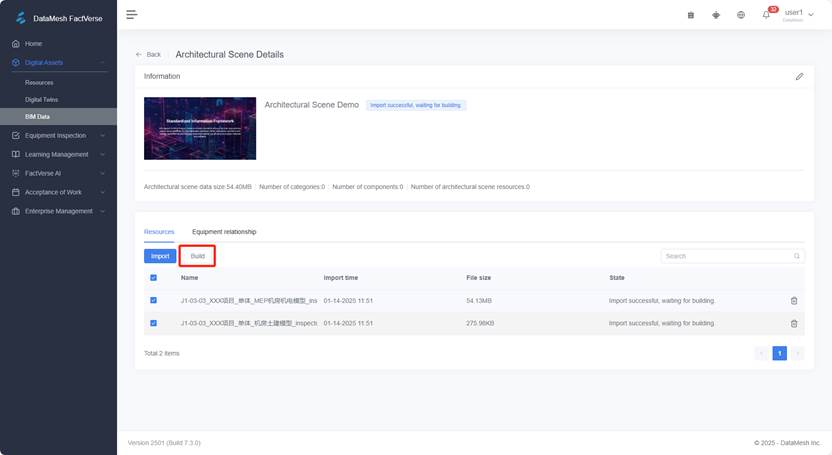
5. Build the Scene: In the scene details, select the BIM file you want to build and click Build. Refresh the page, and once the status changes to “Build Successful,” the scene is ready.

Step 2 View the architectural scene
1. Log into DataMesh Inspector.
2. Open the architectural scene: On the home page, click on the architectural scene “Architectural Scene Demo” that you want to view.
3. First exploration of the architectural scene:
a) Hide parts of the model: Uncheck specific components in the Geometry to hide parts of the model and make it easier to view.

b) Explore the Scene: Use the left joystick on the bottom and the view right joystick to navigate the scene. Adjust the camera height with the up and down arrows to change the viewing angle and find the best perspective.

4. Add a marker:
a) In the marker list, click the Add button.

b) Use the joystick and up and down arrows for position calibration. Click the Drop button to rename the marker to “Conference Room A,” then click the Complete button to finish adding the location marker.
5. Exit 3D mode: Click the Exit button ![]() to leave 3D mode.
to leave 3D mode.
6. View the architectural scene in MR mode:
a) Print the Inspector Marker and place it at the corresponding location in the scene where the marker has been added.
b) On the Architectural scene home page, click the architectural scene “Architectural Scene Demo” that you want to view.
c) Select target marker, then click the MR Mode button.

d) Point your device (iPhone or iPad) camera at the printed Inspector Marker to scan it.
e) As you move your device, the component models will continuously load into your view.

6. View and add annotations:
a) Click on any component to view its information panel.
b) Add annotations or view existing ones for collaborative work.