How Can We Help?
Customize spatial positioning methods
In DataMesh One, users are able to view DataMesh Studio scenarios in Mixed Reality. To ensure that the digital objects are to the desired scale relative to the real environment, DataMesh One users can change the size of the overall scenario and typically use all elements from the first scene to perform adjustments. To ensure that all digital objects are scale relative to each other, DataMesh Studio provides two tools to help scenario editors maintain spatial awareness while engineering their scenes: Reference Models and QR Marker.
Reference model positioning
Reference Models are transparent models that cannot be selected, edited, or moved unless you are in reference mode, and are completely invisible when the scenario is playing. They allow you to position your elements in relation to it, without interfering with your editing process.
Here is how to utilize reference models in your scenes:
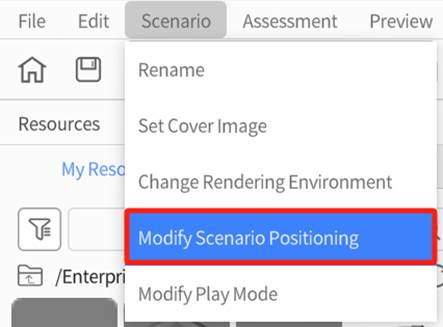
1. To enter reference mode, select Scenario > Modify Scenario Positioning from the toolbar.

2. Find the model you would like to use as your reference model in the resources pane, then drag it into the workspace. In reference mode, you can freely position and adjust your reference model.

3. Once you are done, click the Quit button at the top right of your workspace to exit reference mode.

4. Play the scenario in DataMesh One and use joystick position scenario.
Note: In DataMesh One, the Position Reference setting needs to be set to First Frame, aligning with the first frame of the first scene in the script for positioning.

5. Click ![]() to complete positioning.
to complete positioning.

QR code positioning
QR Markers allow you to view your scenario in Mixed Reality through multiple locations in the virtual space. Each QR Marker corresponds to a QR code, and by scanning a physical copy of that code using DataMesh One, you can generate the digital elements found in your scenario. The layout and position of your roles depend on where you placed your QR Markers and which QR code you scanned. You can also toggle between horizontal markers for QR codes on the floor or a table, and vertical markers for QR codes on the wall.
Note: DataMesh FactVerse Services does not support downloading positioning codes from scenarios created using versions of DataMesh Studio prior to 5.5. To download the positioning codes, you need to open the scenario using DataMesh Studio 5.5 or above, re-upload the scenario, and then you will be able to download the included positioning codes from the FactVerse Service platform.
The steps for using QR code positioning are as follows:
1. Click the Scenario menu in the menu and select Modify Scenario Positioning from the drop-down menu to enter positioning mode.
2. Select the QR code (QR Code_ <number>) that needs to be positioned from the Elements pane and drag it to the desired location.

3. Click a blank space in the workspace to deselect the QR code. Then, in the attributes pane, click the Add Marker button under the Stage Attributes section to add a new marker.

Note: In DataMesh Studio versions 5.6 and up, the maximum number of markers you can add is 100. Otherwise, you can only add up to 10.
Clicking the Remove Marker button per time will sequentially delete a QR code within the scene from back to front.

4. Click the Quit button to exit the positioning mode, edit the scenario and save it.
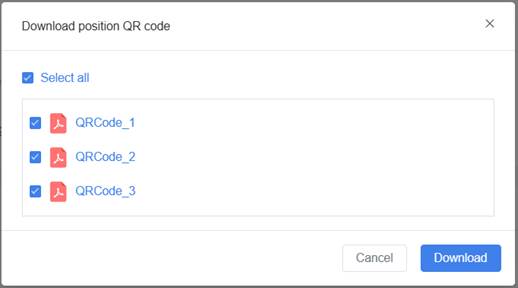
5. Log in to DataMesh FactVerse Services, find the scenario and download the position QR code on the resources detail page.

6. Print the downloaded position QR code.
7. In the MR mode of DataMesh One, scan the QR code printed in step 6 and then the model will appear above the QR code.
