How Can We Help?
Scenarios
A scenario is a .dirpkg file created and edited in DataMesh Studio that consists of multiple scenes, each containing user-added models, pictures, attachments, text, and tools etc. In a scenario, not only you can compose and structure each scene, but also animate dynamic transitions in between the scenes. Scenario management is available in the Digital Assets service module of the DataMesh FactVerse Services platform.
Create a new scenario
To create a new scenario, click the Create button on the homepage. This will open the scenario editing interface and create a new scenario. By default, each new scenario includes two light sources and one camera.
If a scenario file is already open, you can create a new scenario by clicking on the File menu and selecting New Scenario. Note: In this situation, you will be prompted to save the currently edited scenario.

Open a cloud scenario
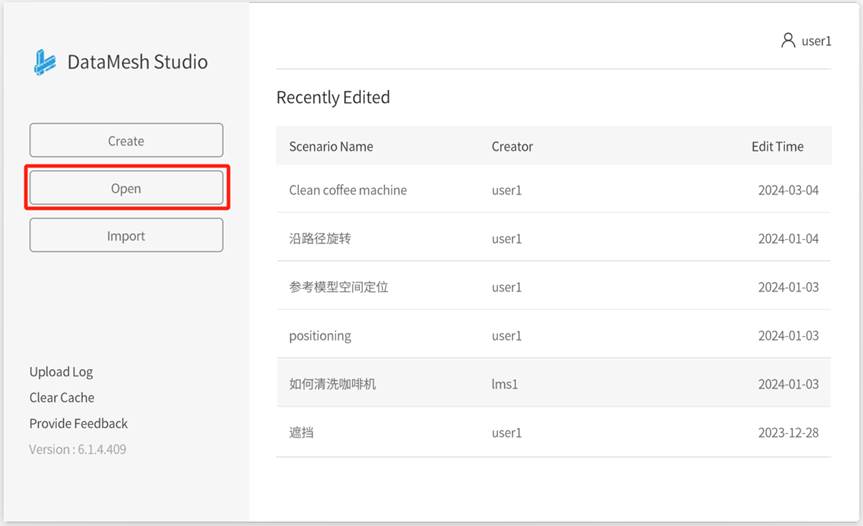
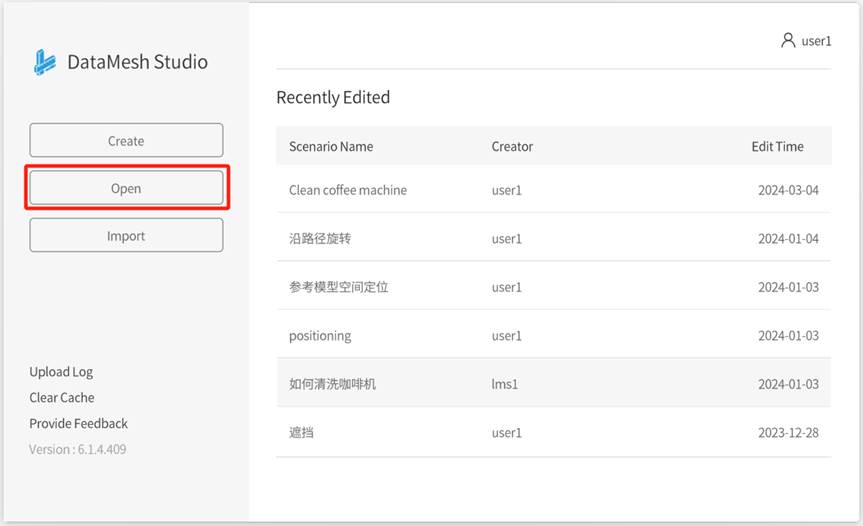
To open a cloud scenario, follow these steps:
1. Click Open on the homepage.
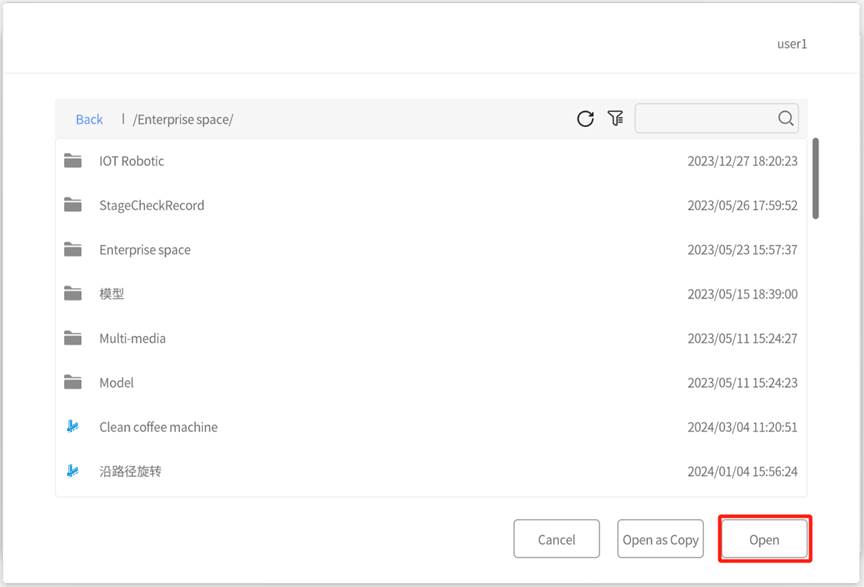
2. In the Open Scenario window, select a cloud scenario and click Open.
If a scenario file is already open, you can open a cloud scenario by clicking the File menu and selecting Open Scenario. Note: In this situation, you will be prompted to save the currently edited scenario.

Save a scenario
To save a scenario to the DataMesh FactVerse Services platform, follow these steps:
1. In the edit interface of DataMesh Studio, click the save button ![]() , or go to the File menu and select Save.
, or go to the File menu and select Save.
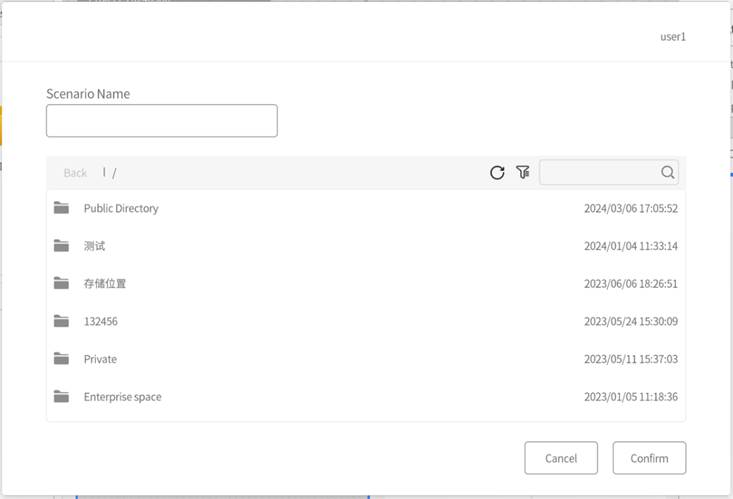
2. If this is your first time saving the scenario, you will be prompted to enter a scenario name, select a storage path, and click the Confirm button in the Save Scenario window to save the scenario.
Import a local scenario
To import a local scenario into DataMesh Studio, please follow these steps:
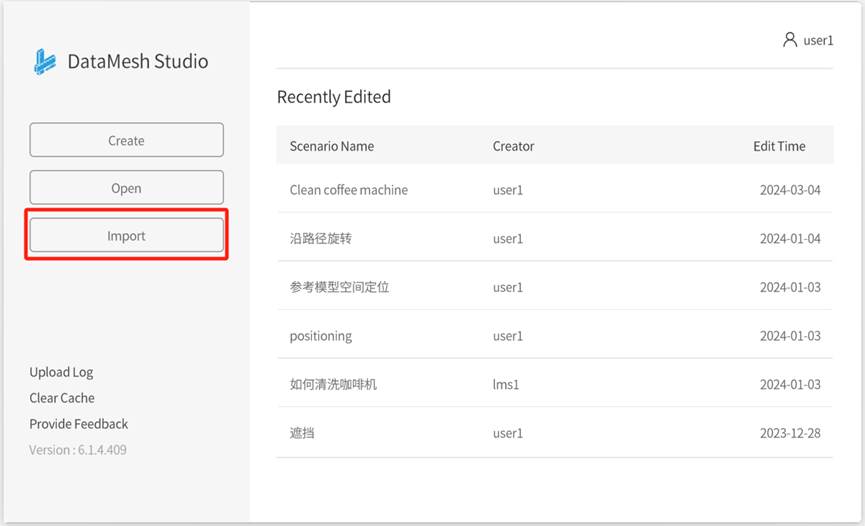
1. On the homepage of DataMesh Studio, click the Import button. This will open a window displaying your local resources.
2. In the local resources window, locate and select the scenario file you want to import, then click the Open (O) button.
3. The scenario will be opened in the DataMesh Studio edit interface, allowing you to view, edit, and save the scenario.
Export a scenario
To export a scenario, follow these steps:
1. Click on the File menu and select Export Scenario. This will open the Export Scenario window.
2. In the Export Scenario window, you can configure the export options by choosing between Export Basic Scenario, Export Full Scenario and Export Accelerated Scenario.
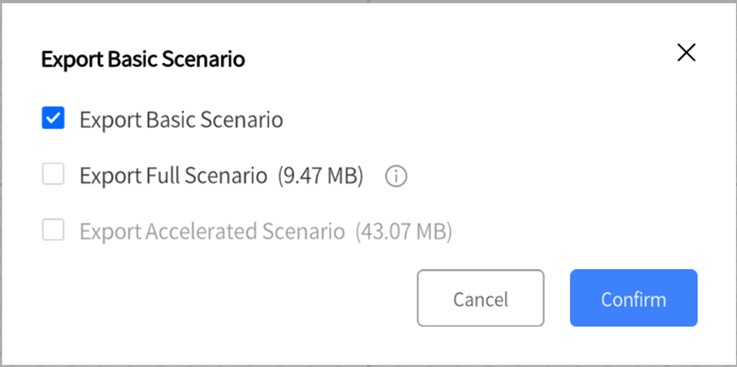
- Export Basic Scenario: The exported scenario file only contains the basic scenario file and an index to its resources, but not the resources themselves. Note: To import and use this basic scenario file, you must have access to all the resources within the scenario.
- Export Full Scenario: The exported scenario includes the basic scenario file and all its resources but does not include an accelerator. This option outputs a lower file size, but scenarios will take a longer time to load.
- Export Accelerated Scenario: The exported scenario includes the basic scenario file, all of its resources, and the resource acceleration attachment. This option outputs a higher file size but takes significantly less time to load.
Preview a scenario
DataMesh Studio supports three play modes:
- Start from Beginning: In the edit interface, you can play the entire scenario using the following methods:
-
- Click the Preview menu and select Start from Beginning.
- Click the first scene thumbnail to set it as the current scene, and then click the play button.
-
- Start Preview: In the edit interface, you can play the scenario starting from the current scene using the following methods:
-
- Select a scene thumbnail and click the play button .
- Click the Preview menu and select Start Preview.
-
- Current Scene Only: In the edit interface, select a scene, and click the Preview menu and select Current Scene Only to play the currently selected scene only.
The scenario will be played in full screen. Press Esc on the keyboard or click the close button in the top right corner of DataMesh Studio to exit the play mode.
Change rendering environment
The rendering environment refers to the background lighting effects used to simulate light propagation, reflection, and refraction in the virtual environment. It influences the appearance, lighting, and shadow effects of objects, enhancing the overall realism and fidelity of the scenes.
In DataMesh Studio, you can choose either the built-in rendering environment or customize the rendering environment for scenario creation, making the virtual scene realistic and immersive.
To change the rendering environment of a scenario, you can follow these steps:
1. Click on the Scenario menu and select Change rendering environment from the dropdown menu. You can open the Change rendering environment window.

2. In the Change rendering environment window, you can choose one of the following system-built rendering environments:
-
- None: No specific environment rendering effects
- Default
- Cloudy outdoors
- Empty hall
- Streets in the city
- Abandoned warehouse
- Spacious and bright warehouse
- Old and cluttered factory
- Cozy and neat kitchen
You can also create a custom rendering environment to suit the scenario’s background and sky effects for different scene requirements and creative purposes.
Steps for custom reflection environment:
1. Prepare six images: These images should correspond to the front, back, left, right, top, and bottom directions of the rendering environment. The images should be in PNG format and follow English naming conventions (Front, Back, Left, Right, Top, Bottom).
2. Compress these images into a zip file and change its extension to .dmcm.
3. Upload this .dmcm file to the resource library on the DataMesh FactVerse Services platform.
4. In DataMesh Studio, click on the Scenario menu and select Change rendering environment from the dropdown menu to open the Change rendering environment window.
5. In the Change rendering environment window, select the Custom tab and click Select rendering environment.

6. In the window for Select rendering environment, find the uploaded .dmcm file.
7. After selecting the file, click the Confirm button to complete the customization of the rendering environment.
Manage scenario structure
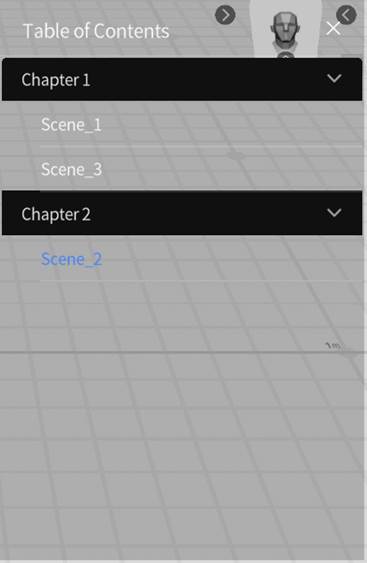
In DataMesh Studio, the table of contents is used to display a list view of the structure of scenes chapters in the current scenario.
By clicking the table of contents button ![]() , you can browse the entire scenario, grasp the overall structure and chapter contents, and quickly jump to the desired chapters and scenes.
, you can browse the entire scenario, grasp the overall structure and chapter contents, and quickly jump to the desired chapters and scenes.

The following are the basic operations on the scenario structure:
-
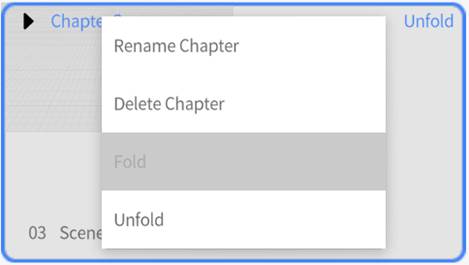
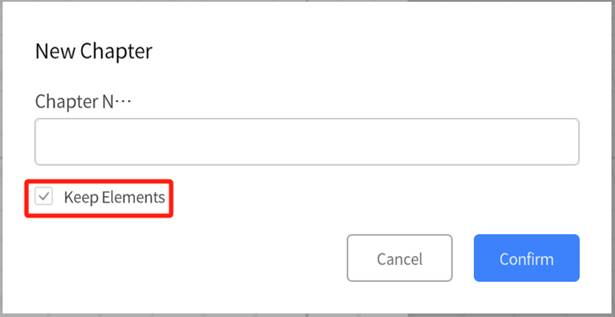
- Start New Chapter: Each chapter in the table of contents represents a group of scenes. To start a new chapter, you can right-click on a scene in the timeline, select New Chapter, and a window will appear. Type in the chapter’s name, and this will make the selected scene a starting point for a new chapter.

Keep Elements: This option is a checkbox found in the New Chapter window that toggles whether or not you keep the elements from the previous scene. When checked, all the elements remained where they were. When unchecked, this converts the scene into a completely blank slate by removing all of its elements.
-
- Delete Chapter: To delete a chapter, right-click on the chapter name in the timeline and select Delete Chapter. This will remove the chapter and all its associated scenes from the catalog.
- Rename Chapter: To rename a chapter in the scene catalog, right-click on the chapter name in the timeline and select Rename Chapter.
