How Can We Help?
Login

Language: You can switch the interface language to Simplified Chinese, English, Japanese, and Traditional Chinese.
Server: This changes which server you connect to. Make sure that the server you connect to is the same one that your organization uses.
![]() : Private Server icon. This allows you to enter a private server, which requires a password to access.
: Private Server icon. This allows you to enter a private server, which requires a password to access.
Demo: It allows users to watch built-in models, scenarios, and events provided by DataMesh as a guest.
QR code login: For more details, please refer to our QR code login article.
Third-party login: For more details, please refer to our Third-party login article.
Note: After successful login, users with standard mode permissions can only enter the standard mode interface. Users with training mode permissions can only enter the training mode interface. Users with both mode permissions by default enter the training mode interface, and users can switch the browsing mode in Settings.
Regular login
On the login interface of DataMesh One, use your account and password to log in.
Steps
1. Open the Login interface of DataMesh One.
2. Select the language.
3. Configure server:
a) Select public server: If your enterprise is deployed on a public server, choose the server belonging to the enterprise account from the server list.
b) Set up private deployment server: If your enterprise uses a private deployment server, you need to click on the private deployment icon ![]() to set the exclusive service code.
to set the exclusive service code.

4. Enter your FactVerse account and password.
5. Check the box “I have read and agree to the DataMesh ‘Terms of Use’ and ‘Privacy Policy’”, then click the Sign in button.
6. Select your enterprise account: If you have multiple accounts, select the correct one from a list.

7. Select browsing mode: If your account has licenses for two different browsing modes simultaneously, the mode selection interface will be displayed. Choose your mode and click the Enter button to complete login.

Third-party login
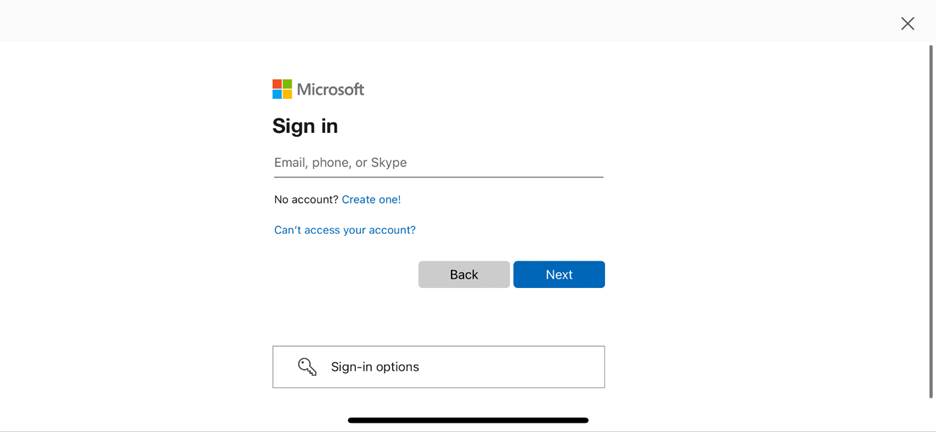
DataMesh One supports using Third-party login methods for logging in, using Microsoft Entra ID, an identity and access management service, in order to enhance user security.
Steps
1. Open the Login interface of DataMesh One.
2. Select the language.
3. Configure server:
a) Select public server: If your enterprise is deployed on a public server, choose the server belonging to the enterprise account from the server list.
b) Set up private deployment server: If your enterprise uses a private deployment server, you need to click on the private deployment icon ![]() to set the exclusive service code.
to set the exclusive service code.
4. Click on the third-party login icon ![]() , and confirm the pop-up message.
, and confirm the pop-up message.
5. Select browsing mode: If your account has licenses for two different browsing modes simultaneously, the mode selection interface will be displayed. Choose your mode and click the Enter button to complete login.
QR code login
Using the QR code login feature provided by DataMesh FactVerse, quickly log in to your account on DataMesh One.
Steps
1. Open the Login interface of DataMesh One.
2. Select the language.
3. Configure server:
a) Select public server: If your enterprise is deployed on a public server, choose the server belonging to the enterprise account from the server list.
b) Set up private deployment server: If your enterprise uses a private deployment server, you need to click on the private deployment icon ![]() to set the exclusive service code.
to set the exclusive service code.
4. Click on the scan code icon![]() , and a scanning frame will appear.
, and a scanning frame will appear.
5. Log in to FactVerse, click on the username in the top navigation bar, and select QR code login in the account function menu. Note: Please select the same server on both the One side and the FactVerse platform. For example, if you have chosen China on the One side, ensure that you log in to the FactVerse platform using the correct URL: https://dcs.datamesh.com.cn/ to obtain the corresponding QR code.
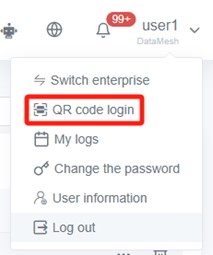
6. The system will automatically generate a QR code that refreshes at intervals.
7. Use DataMesh One to scan the QR code generated on the FactVerse platform in Step 6. After successfully scanning, a prompt window will appear.
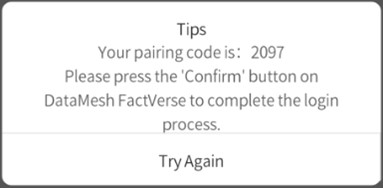
8. In the QR code login confirmation window on the FactVerse platform, click Confirm to complete the login.

9. Select browsing mode: If your account has licenses for two different browsing modes simultaneously, the mode selection interface will be displayed. Choose your mode and click the Enter button to complete login.
SMS verification login
When a company enables the dual authentication of FactVerse accounts using both passwords and SMS, users logging into the DataMesh client and the FactVerse platform need to undergo SMS verification.
Upon your initial login to DataMesh One, a prompt to bind your mobile phone number will appear. You need to log in to the FactVerse platform to bind a mobile phone number for login verification. For detailed instructions on how to bind your phone number, please refer to the FactVerse User Manual.
Once your phone number is bound, the steps for using SMS verification to log in on DataMesh One are as follows:
1. Open the DataMesh One login interface.
2. Select the language.
3. Configure server:
a) Select public server: If your enterprise is deployed on a public server, choose the server belonging to the enterprise account from the server list.
b) Set up private deployment server: If your enterprise uses a private deployment server, you need to click on the private deployment icon ![]() to set the exclusive service code.
to set the exclusive service code.
4. Enter your FactVerse account and password, then click the Login button.
5. Check the box “I have read and agree to the DataMesh ‘Terms of Use’ and ‘Privacy Policy’”, then click the Sign in button.
6. Choose the company your account belongs to (optional): If you have multiple enterprise accounts, a list of company accounts will be displayed for you to choose from.
7. The mobile phone you bound will receive a login verification code, valid for 5 minutes.

8. Enter the verification code.
9. Select browsing mode: If your account has licenses for two different browsing modes simultaneously, the mode selection interface will be displayed. Choose your mode and click the Enter button to complete login.
External login
External personnel of the enterprise undergoing training (e.g., pre-employment onboarding training) can log into DataMesh One’s training mode using the following steps:
1. Enterprise training instructors create a temporary training group: Enterprise training instructors establish a temporary training group and add temporary training members (student names and IDs).
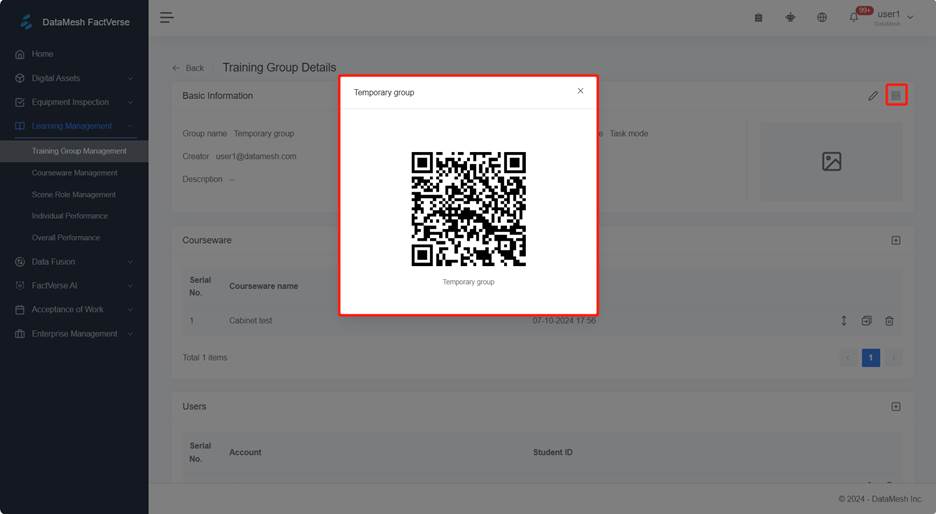
2. Enterprise training instructors obtain the QR code for the temporary training group: Instructors obtain the QR code for the group from the training group details page and share it with the group members.
3. Temporary training group members log into the training mode:
a) Open the DataMesh One login page.
b) Select the language.
c) Configure server:
i. Select public server: If your enterprise is deployed on a public server, choose the server belonging to the enterprise account from the server list.
ii. Set up private deployment server: If your enterprise uses a private deployment server, you need to click on the private deployment icon ![]() to set the exclusive service code.
to set the exclusive service code.
d) Click on the scan code icon ![]() , and a scanning frame will appear.
, and a scanning frame will appear.
e) Scan the QR code of the temporary training group to open the external personnel login interface.
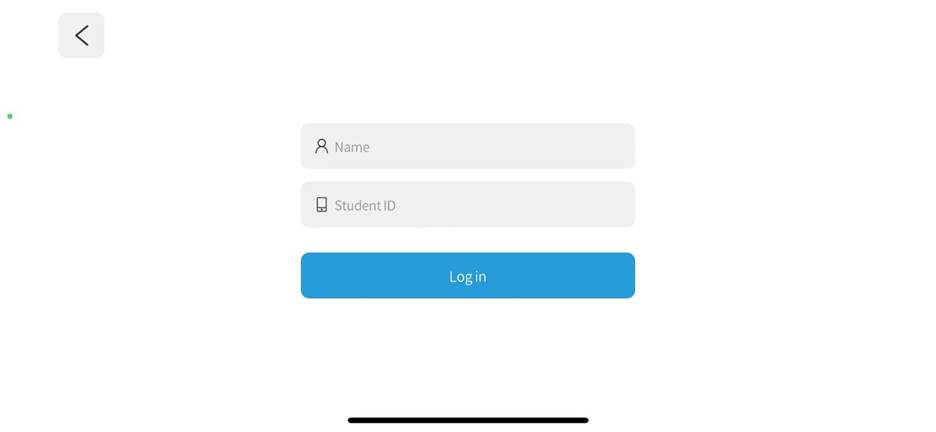
f) In the external personnel login interface, use the student’s assigned name and ID from the group to log into the training mode.
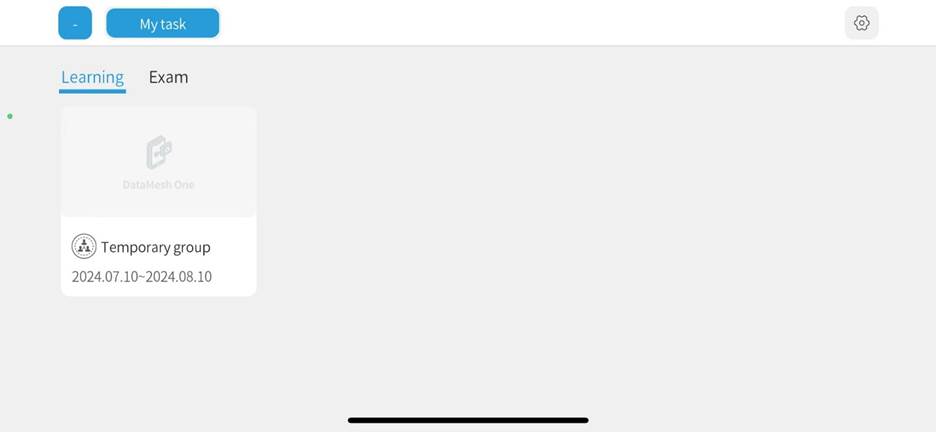
After successful login, external users will directly enter DataMesh One’s training mode. In this mode, external users can only access the “My Tasks” interface, ensuring they can view and execute tasks assigned to them.