How Can We Help?
DataMesh One 7.0 (Meta Quest 3) Quick Start Guide
Meta Quest 3 hand tracking gestures
To select something: When the cursor appears, point your hand at what you want to select. Then, pinch your thumb and finger together to select.
Scrolling up, down, left, or right: Pinch your fingers inward. While still pinched inward, move your hand up, down, left or right to scroll. When you’re done scrolling, release.
Brings you back to your Meta Home menu: Look at your palm at eye level, then hold your thumb and index finger together until  fills, then release.
For detailed instructions on the Meta Quest hand tracking gestures, please refer to Getting started with Hand Tracking on Meta Quest headsets.
Use Meta Quest Touch Plus controllers
Trigger (on the front of the controller): Used for all click (confirm) interaction operations.
Grip button (on the side of the controller): In the scenario, used to bring up the menu bar.
Thumbsticks: Used to control scenario flipping; swipe left for the previous page, swipe right for the next page.
 button: Abort program, enter the system main interface (where you can choose to continue or exit the program). For detailed instructions on the Meta Quest Touch Plus controller, please refer to Meta Quest Touch Plus controllers.
Standard mode
DataMesh One has two browsing modes: Standard Mode and Training Mode. In Standard Mode, users can freely browse various resources and scene contents while also participating in multi-user collaboration events. You can switch browsing modes on the settings page.
Navigation menu

Resources
In Standard Mode, the “Resources” page contains all the folder directories and resource files accessible to the current account. You can switch between browsing scenario-type resources or other types of files, such as 3D models, images, and PDF files, by clicking on the Scenario or Element tab in the top right corner of the page.
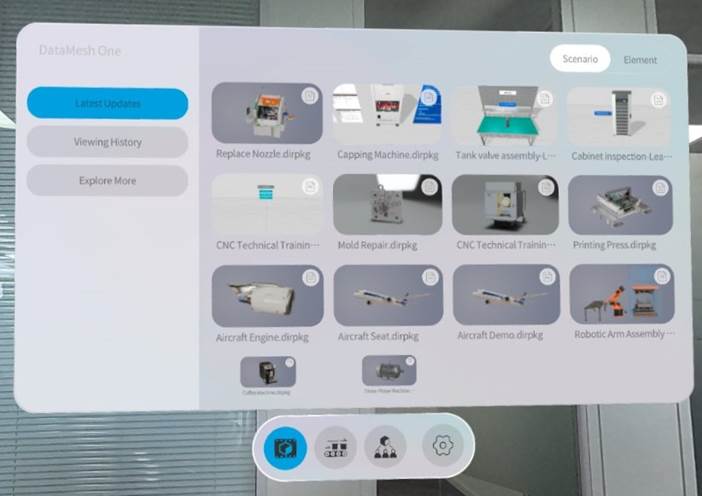
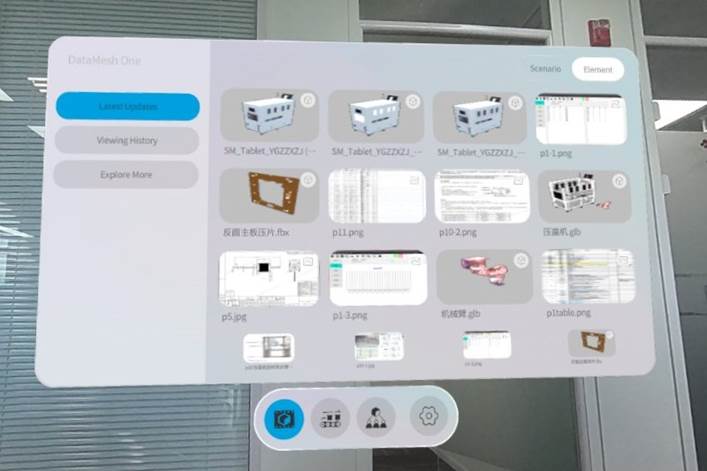
Scenes
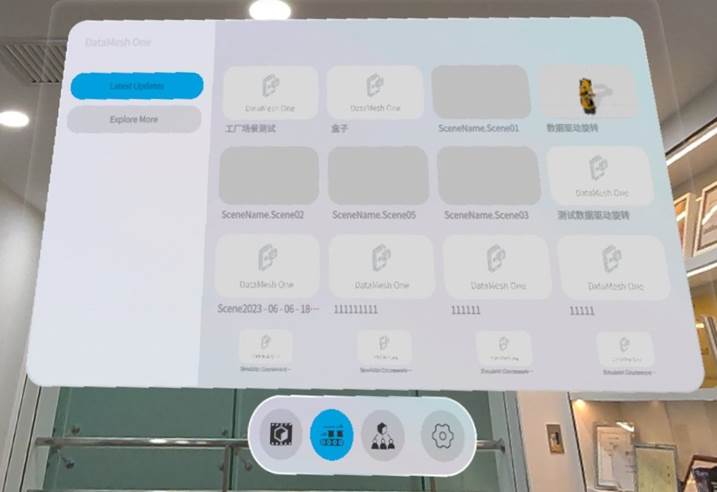
Events
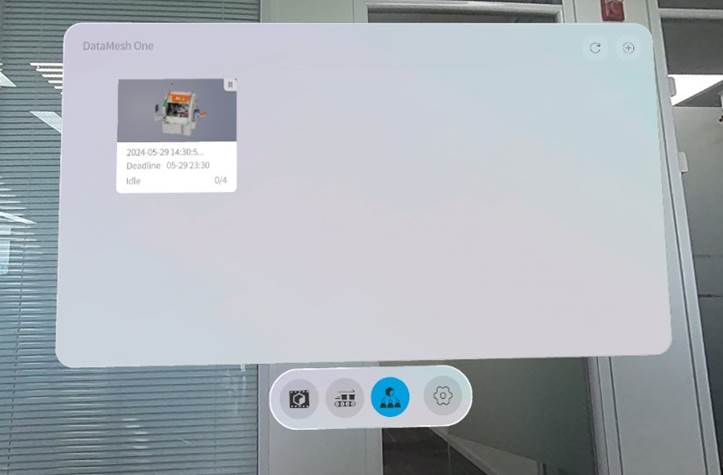
Training mode
In Training Mode, you can complete learning tasks and exam tasks, experiencing a more immersive learning environment through XR-based technology.
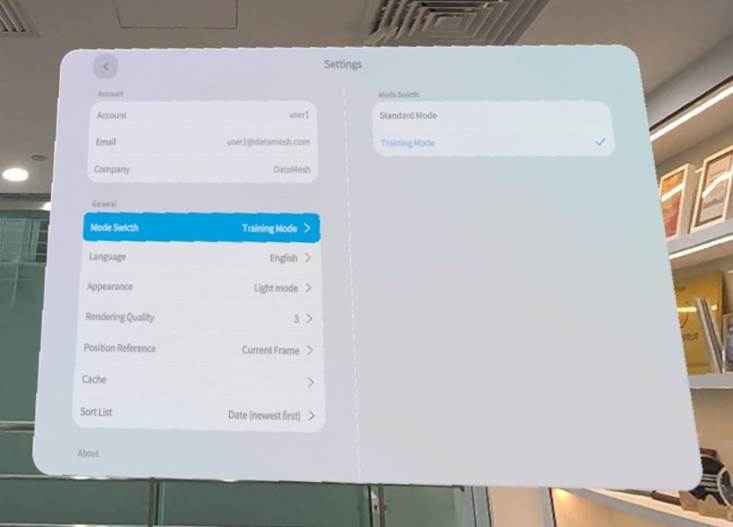
Navigation menu
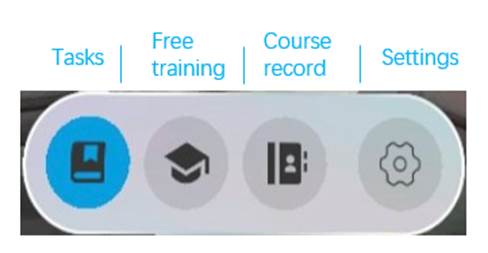
Group list
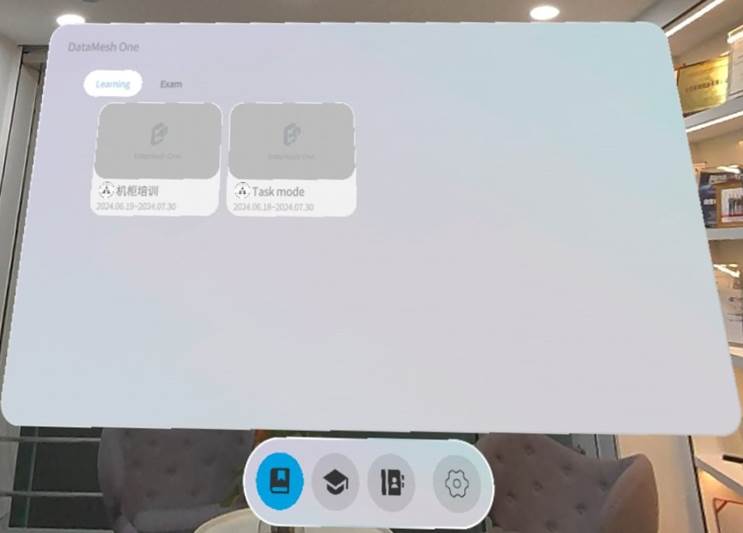
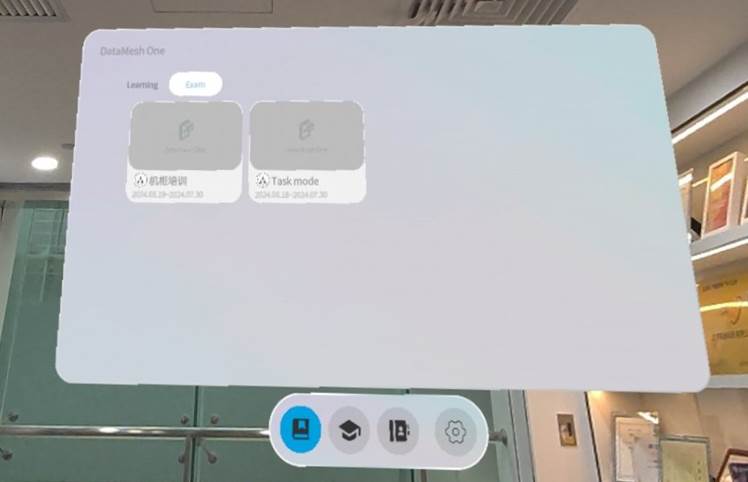
Coureseware list
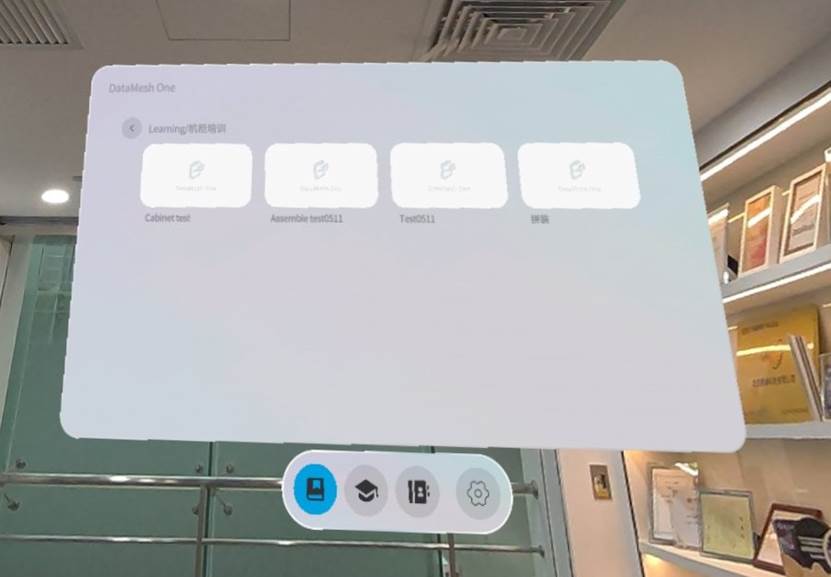
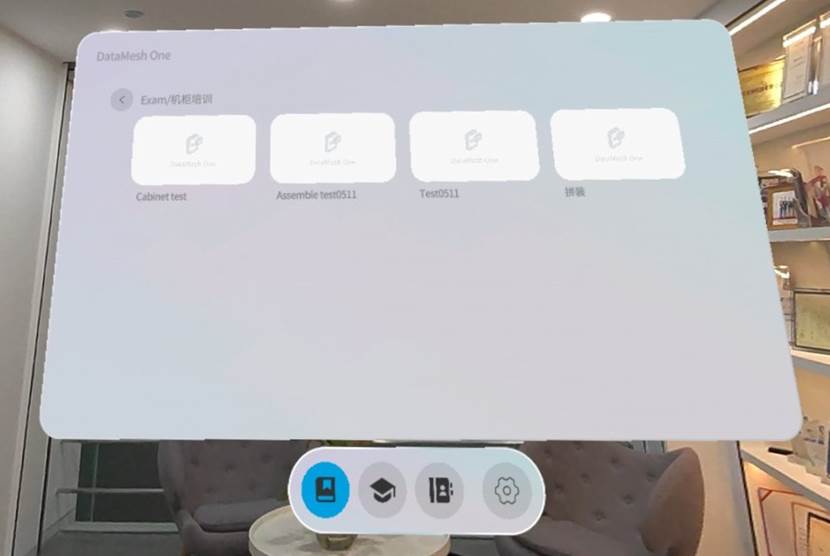
Course record interface
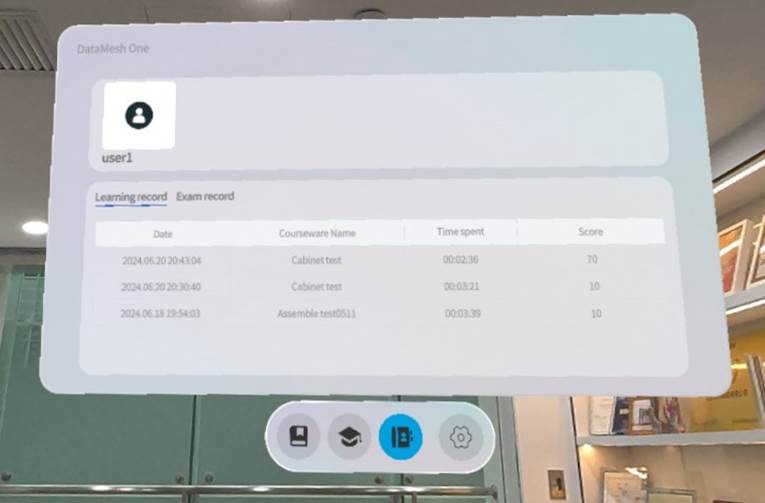
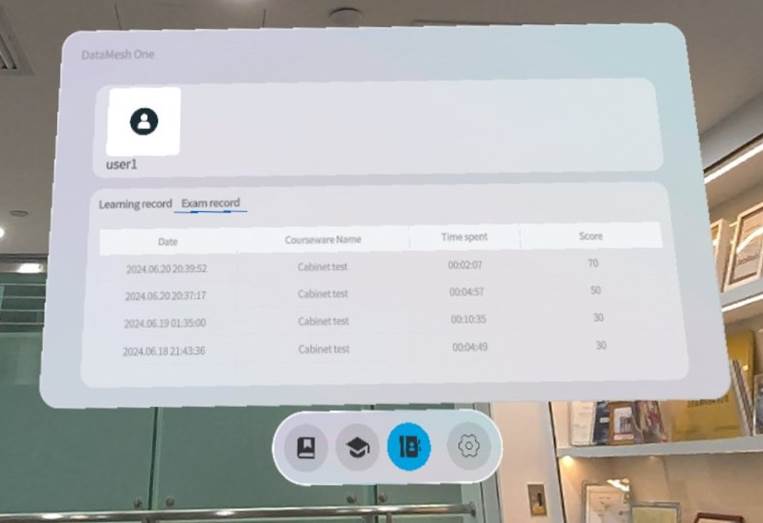
Quick start
Preparation
Connect Wi-Fi
Make sure the Meta Quest 3 device is connected to the internet.
1. Press  on the right Touch controller to open the universal menu.
2. Hover over the clock on the left side of the universal menu. Once the Quick Settings appear, select it to open the Quick Settings window.
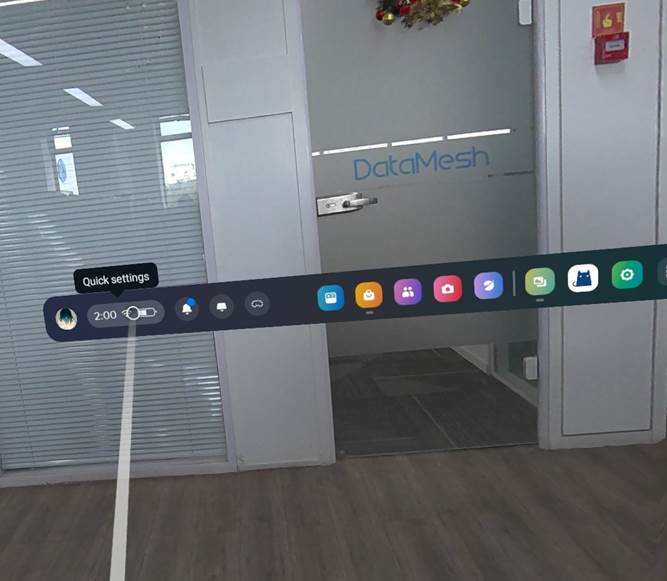
3. Choose Wi-Fi.
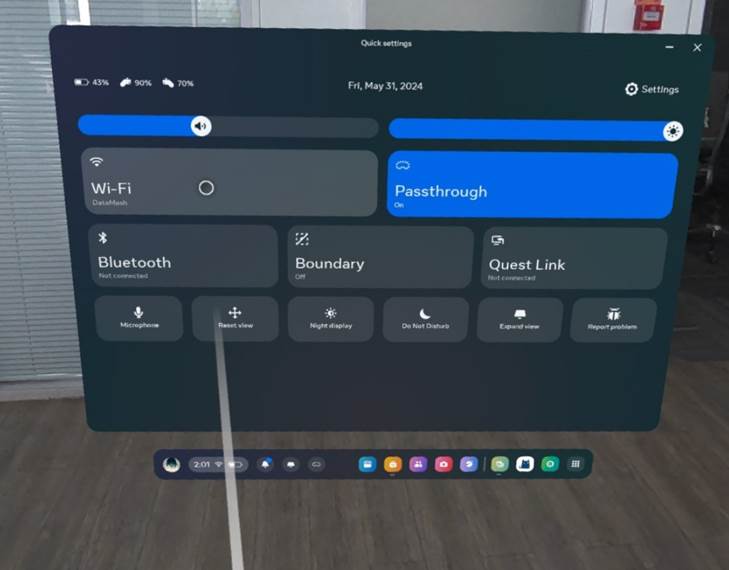
4. Turn on the Wi-Fi switch, then select the Wi-Fi network you want to connect to and enter the password.
Install DataMesh One
Three methods:
-
- Select the Store from the universal menu, and find and install DataMesh One in the Meta Quest store.
- Download and install DataMesh One via browser from the following address: https://www.meta.com/experiences/7770629926299654/
- Download and install DataMesh One via the short link: datame.sh/OneQuest3.
Set boundaries
Before starting to set boundaries, please make sure you have worn the Meta Quest device and ensure that the surrounding environment is open and free of obstacles that may threaten your safety.
Note that during the use of DataMesh One, when you step out of the boundary, you will not be able to view 3D models, files, and other resources, so please operate within the set boundaries.
The steps to set boundaries are as follows:
1. Press  on your right Touch controller to pull up your universal menu.
2. Hover over the clock on the left side of the universal menu. When Quick Settings appears, select it to open the Quick Settings panel.
3. Select  Boundary.
4. Select Stationary or Roomscale, then follow the on-screen instructions to set up your boundary.
-
- Stationary: For using your headset while sitting or standing in place. Stationary Mode creates a default boundary area of 3 feet by 3 feet (1 meter by 1 meter) centered on yourself.
- Roomscale: For using your headset while moving around inside your play area. Roomscale allows you to draw your boundaries in your physical space using your Touch controller. We recommend a safe and unobstructed space measuring at least 6.5 feet by 6.5 feet (2 meters by 2 meters).
For more information on setting boundaries for Meta Quest, please refer to Set up your boundary for Meta Quest.
Login
Click on the account input box, and a virtual keyboard will appear. Enter your account and password in sequence to log in.
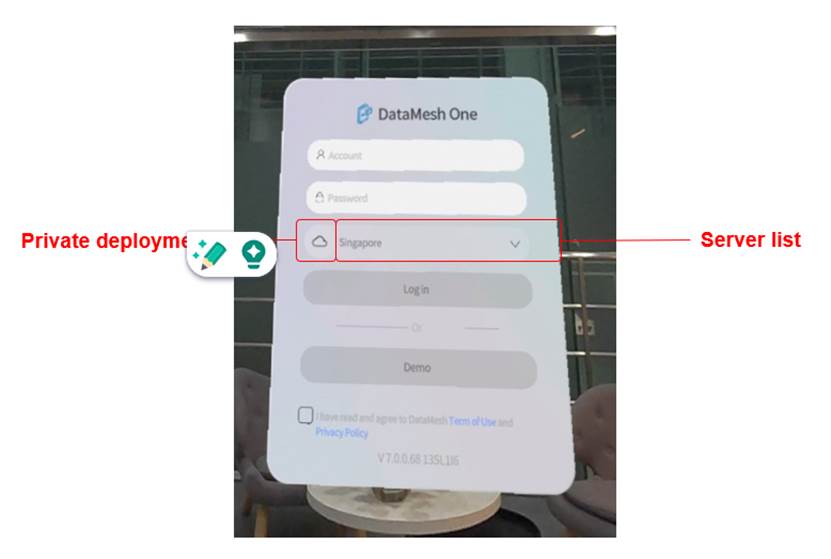
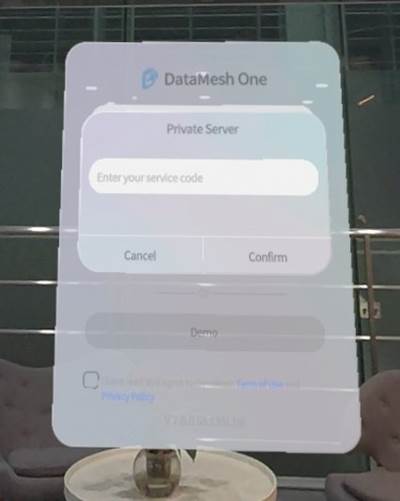
Private Deployment  : When logging in to an enterprise using a private deployment server, you need to set a private deployment service code. Users can click on this icon to set the private deployment service code.
Server List: Clicking on the server list allows you to switch server regions.
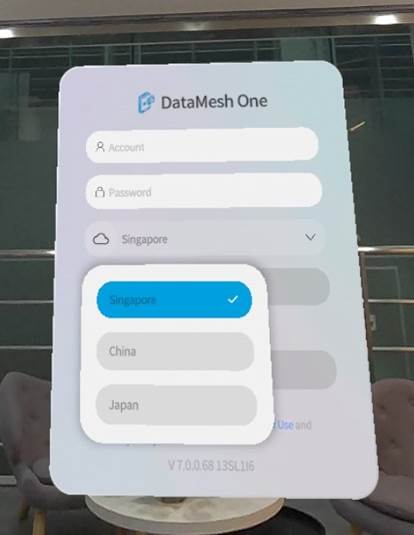
Demo Mode: Clicking on it to enter DataMesh One in guest mode.
Play scenario
In the standard mode of DataMesh One, you can follow these steps to play the scenario:
1. In the resources page, select the scenario file you want to open, press the Trigger button at the front end of the right Touch controller, or open the scenario through gestures.
2. After the scenario is loaded, start playing the scenario.
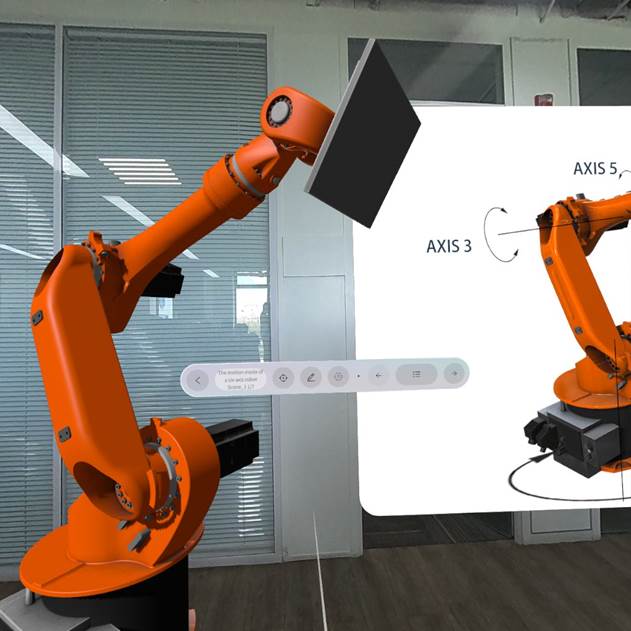
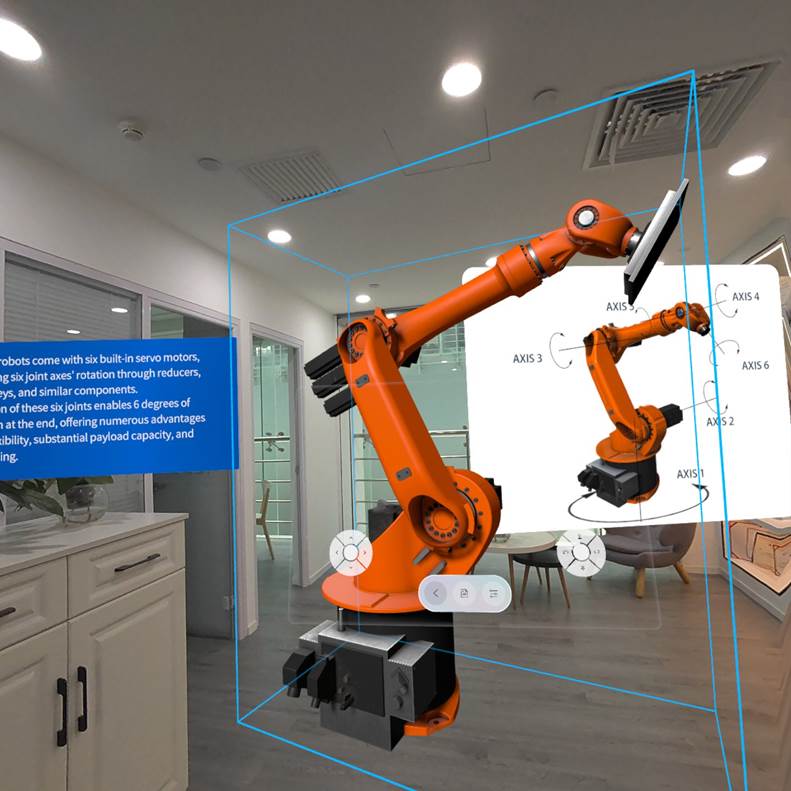
In the scenario playback interface, you can use the scenario operation menu to position and edit the scenario. The scenario operation menu is as follows:

- Position: Click to enter positioning mode.
- Edit: Drag, move, rotate, etc., the model as a whole or in parts through gestures.
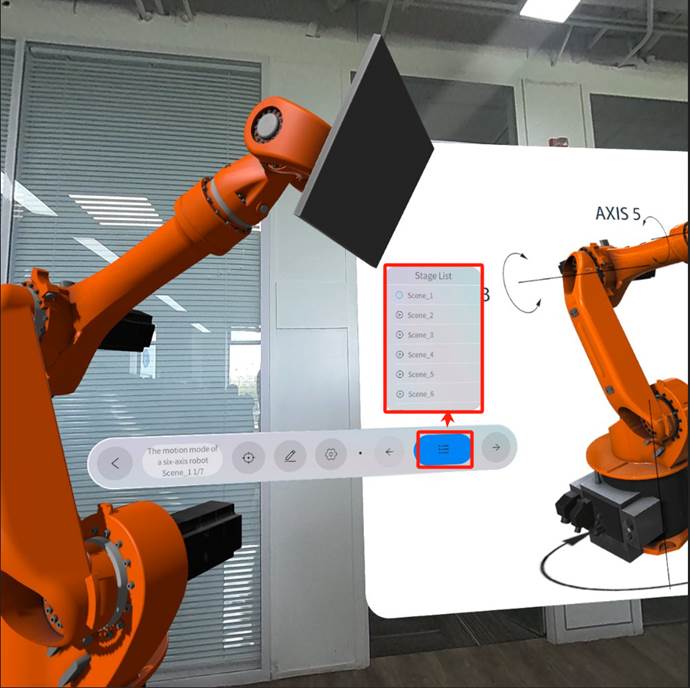
- Stage List: Click to display a list of scenario scene playback steps, and click on the scene name to jump to the specified scene
- Exit: Click to exit scenario playback
- Back/Next: Page-turning arrows.
Take a capture
Shortcut
Press  on your right Touch controller and press the trigger button once.
The other method
1. Press  on your right Touch controller to suspend the app.
2. In the suspension window, tap the camera icon to take a capture.
Record video
Start recording
1. Press  on your right Touch controller to pull up your universal menu.
2. Select Camera then select Record Video.
Note: A red dot will appear in VR to indicate that recording has started. This video capture indicator can be controlled from Settings.
Stop recording
1. Press  on your right Touch controller to pull up your universal menu.
2. Select Camera then select Recording.
Collaboration
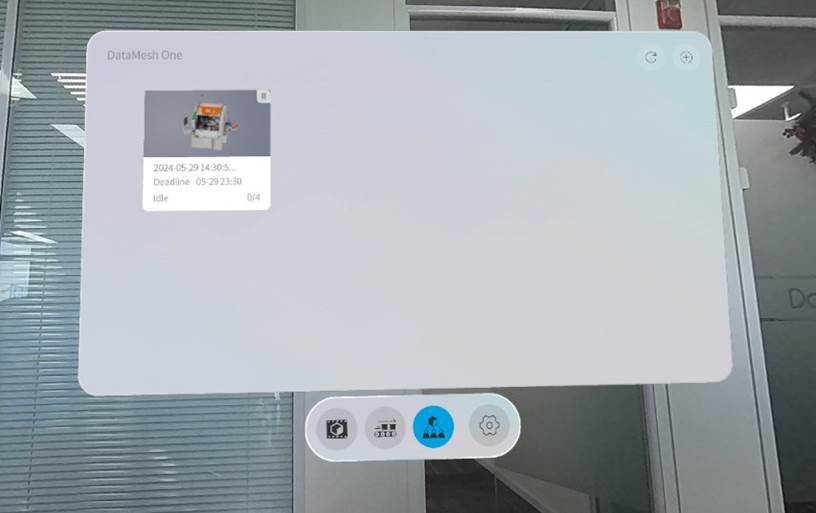
1. Click on the Events tab in the navigation menu to switch to the event list.
2. Click on the “+” button in the top right corner of the events page to enter the event creation interface.
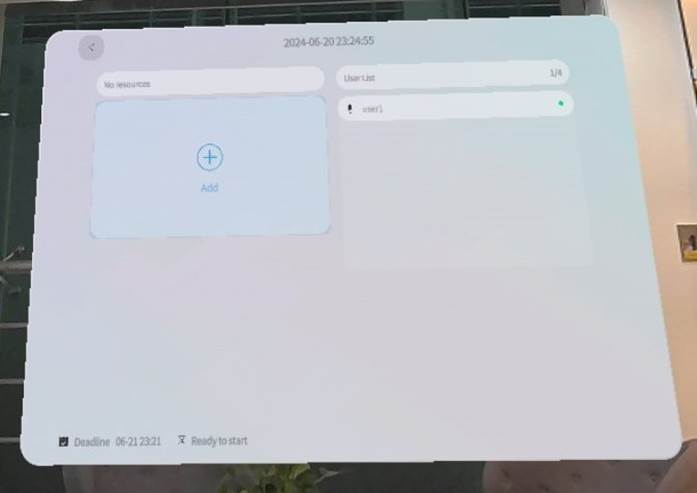
3. Click on the Add button to open the scenario list, select a scenario for the event, and save.
4. Click on the Play button to start the event.
The collaboration features on Meta Quest are the same as those on the iOS end. For more details, please refer to the Events section in the DataMesh One user manual.
Cast to a screen
Cast to a phone
1. Download the Meta Quest mobile app to your phone.
2. Make sure your phone and headset are on the same Wi-Fi network.
3. Turn on Bluetooth.
4. Make sure your headset is close to your phone.
5. Open and log in to the Meta Quest app and make sure the headset and your phone are logged into the same Meta account.
6. Tap Casting from the Meta Quest app.
Cast to a computer
1. Make sure your computer and headset are on the same Wi-Fi network.
2. Press Meta button  on your right controller to open the universal menu.
3. Select Camera and select Cast.
4. Select Computer then select Next to connect.
5. Take off the headset.
6. On your computer, open your browser then go to oculus.com/casting and log in. Note: Make sure the headset and your computer are logged into the same Meta account.