Construction

Add Markers and Annotations to Your BIM Scene

This guide introduces the features and functionality of DataMesh Inspector, including how to deploy your scene in MR (Mixed Reality) mode. You can realize scene navigation by adding markers, collaboration annotations, and other key functions, addressing needs such as construction supervision and troubleshooting during building projects.
Inspector
Beginner

Through this example, you will know:

  • Add markers to your BIM scene
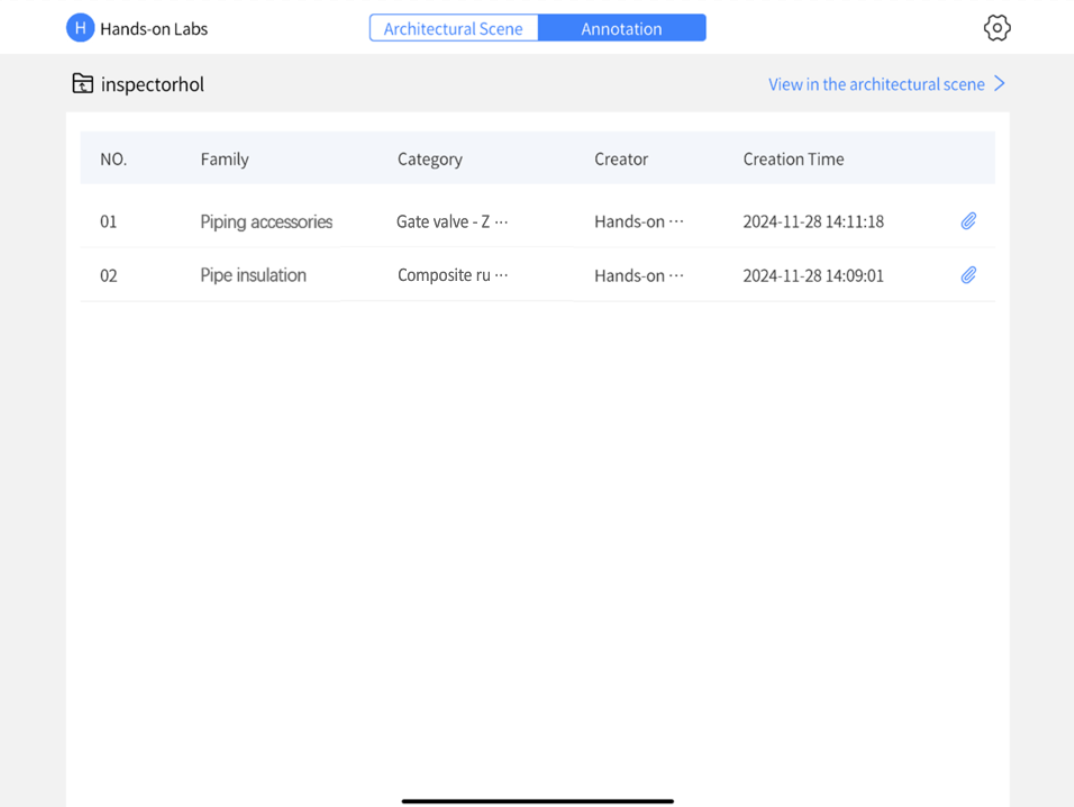
  • Add supporting resources
  • Use collaboration annotations
  • Conduct retrospective inspections
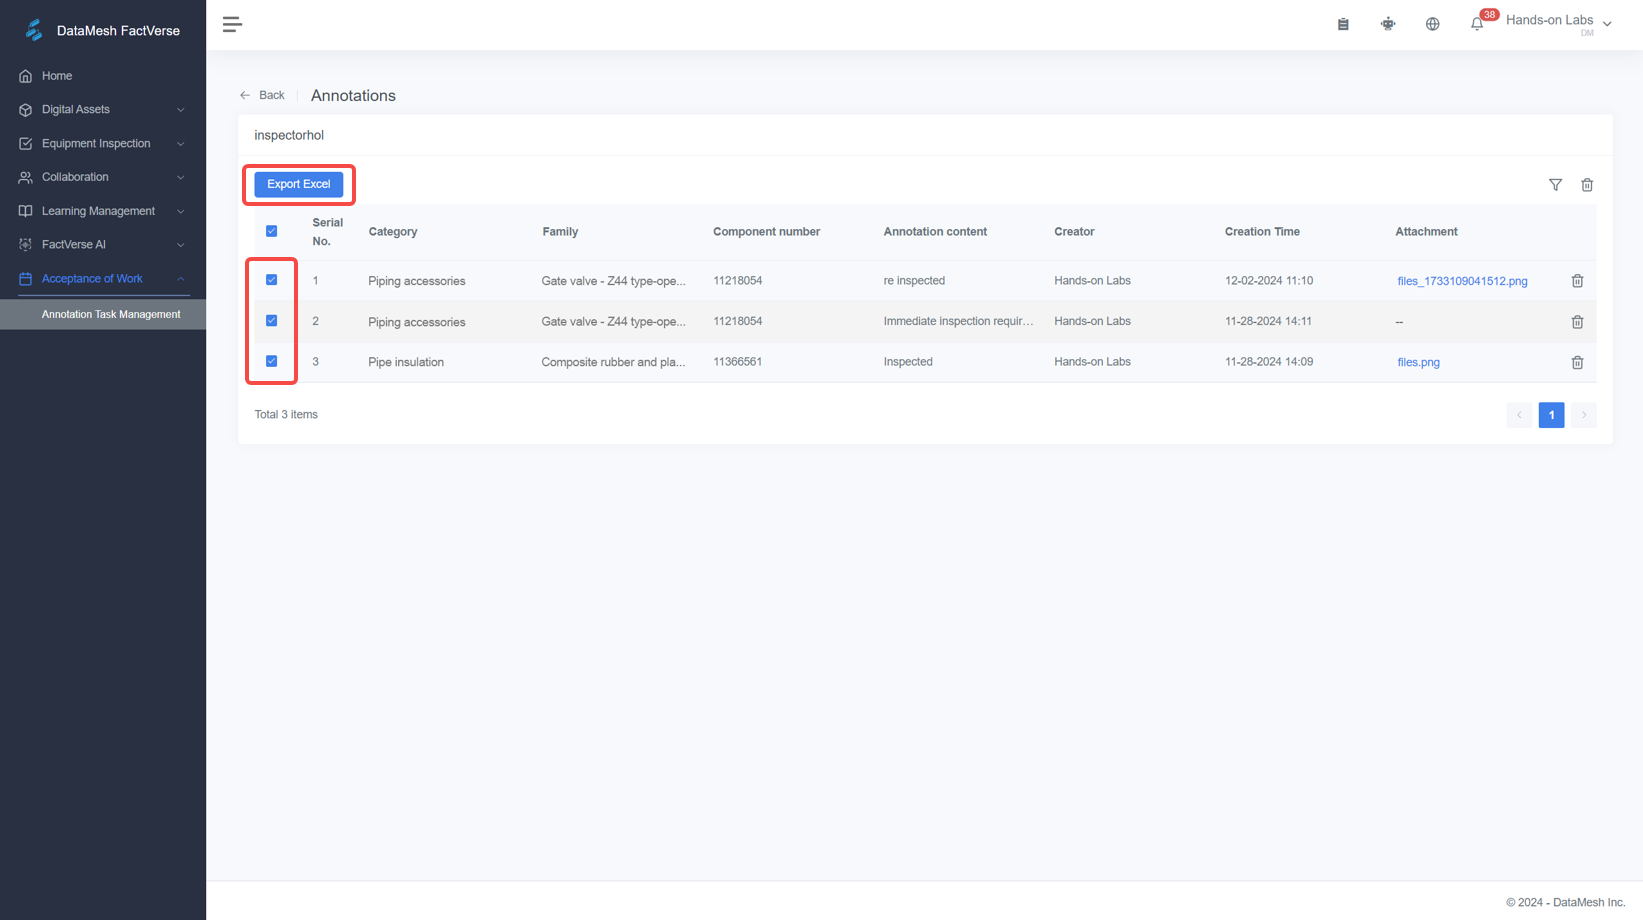
  • Manage annotation tasks

Steps

1

Prerequisites

Before you begin, ensure you have completed the following steps:

  1. Learn how to upload files;
  2. Learn how to build BIM scenes.

Recommended Lab: "Build a Digital Twin BIM Scene Quickly"

2

Add markers to your scene

  1. If you need to perform area-based inspections within the scene, you can add markers to divide the scene into different sections.
  2. Click '+ Add', adjust the viewpoint to position the marker, then click to place it and name it.
  3. You can also click on [⋯] to rename, reposition, or delete existing markers.
  4. When you return to the scene homepage, you can quickly navigate to any location by selecting the corresponding marker.
3

Filtering infrastructure by system or category

  • Select the model layers you want to display in the Geometry on the left. Layers that are unchecked will not appear. By default, all layers are selected.
4

Add auxiliary resources

  1. If you need to reference layout plans, review documentation, or place models during construction supervision, you can add auxiliary resources to the scene for easy access at any time.
  2. First, upload the auxiliary resources to the DataMesh FactVerse resource library.
  3. Click the "Resources" button, navigate to "Select resources-Add to the scene", and place the resource in the scene after attaching it to a component. You can click on any auxiliary resource to adjust its orientation or perform other modifications.
5

MR mode collaboration annotations

  1. Once you have added markers, select a marker and scan the Inspector Marker to enter MR mode. This enables quick navigation within the scene.
  2. In MR mode, as you move your handheld device, the system will continuously load components based on your position, providing real-time updates of the scene that match your field of view.
  3. To add an annotation, select the equipment to be maintained, click the "Annotation" button, then select "Add Annotation" to add text or image-based notes.
6

Retrospect inspection

  1. On the Annotation page, select the BIM scene you want to review, and view the details. Click "To Check" to enter the scene for verification.
  2. Once enter the scene, enable the annotation browser, then view and comment on annotations listed under "All Annotations" on the left. Click on any annotation to quickly navigate to that location for a follow-up inspection.
7

Export annotation record

  1. You can export annotation records from the DataMesh FactVerse platform.
  2. Click "Work of Acceptance" on the left menu, then go to "Annotation Task Management". After associating a BIM scene, you can view all its annotation records in the scene.
  3. Click the detail button of the file, choose the annotation records, and export the list in Excel format. 

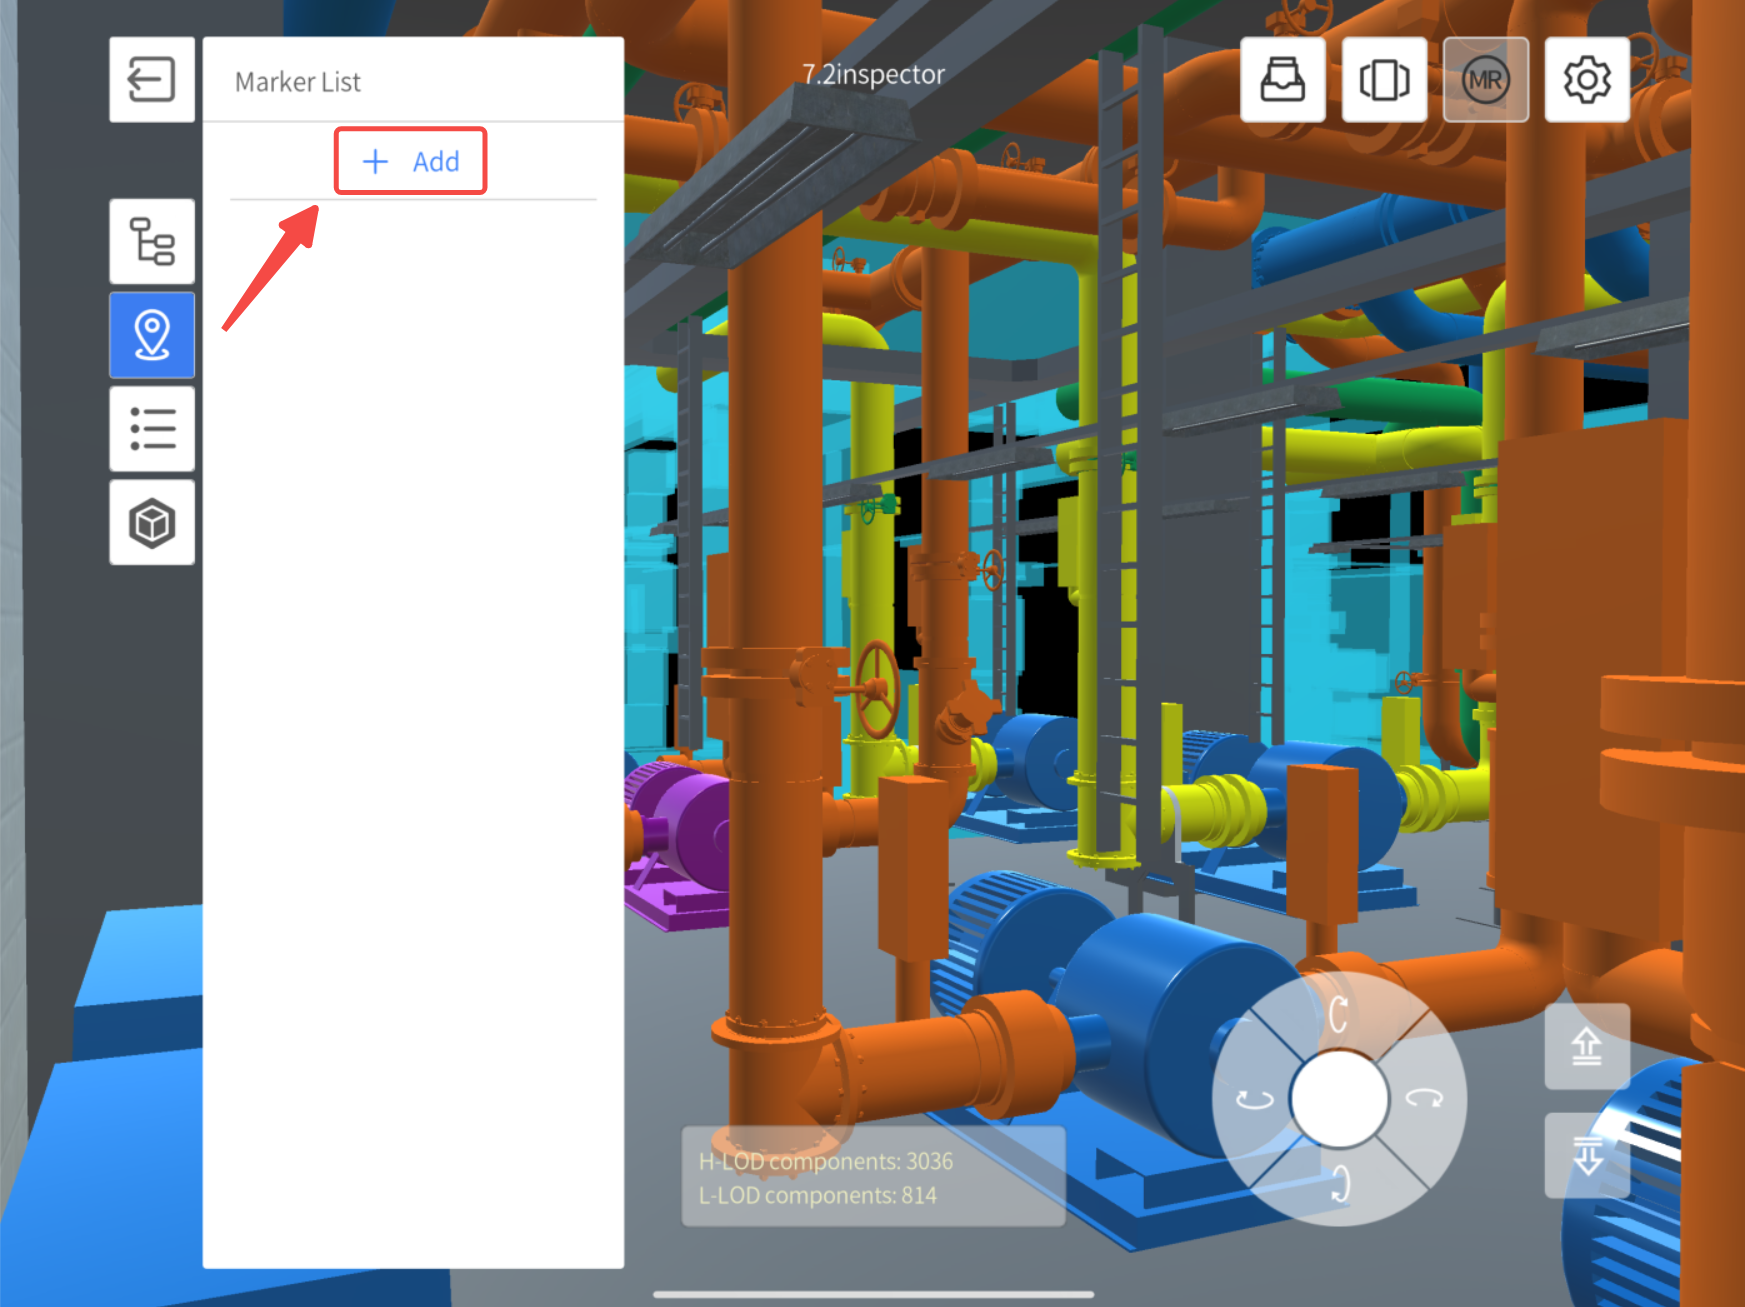
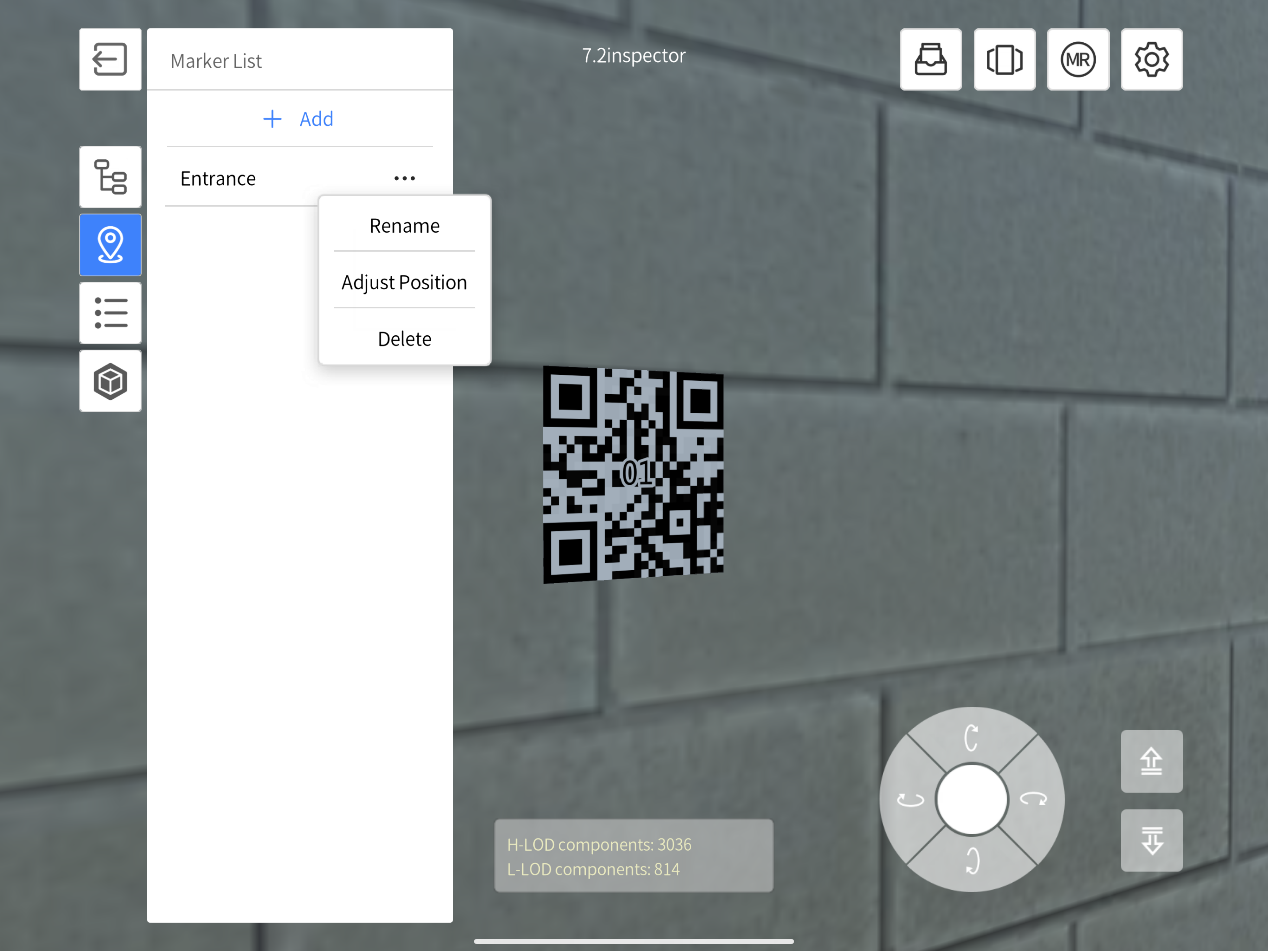
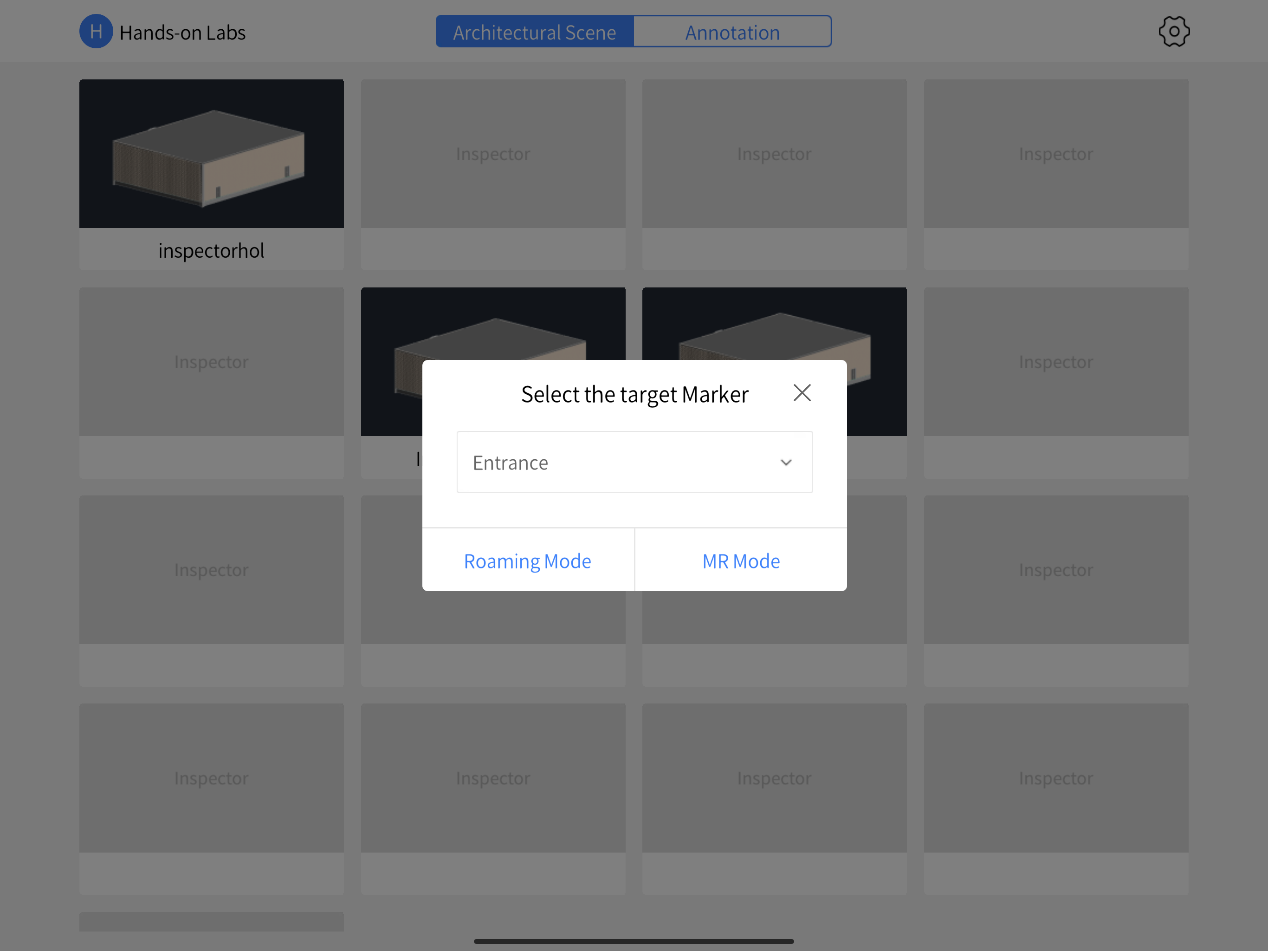
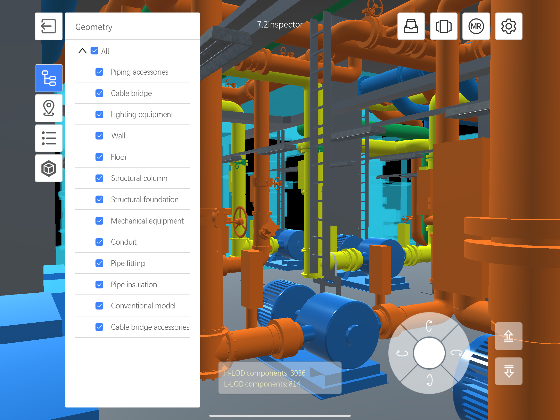
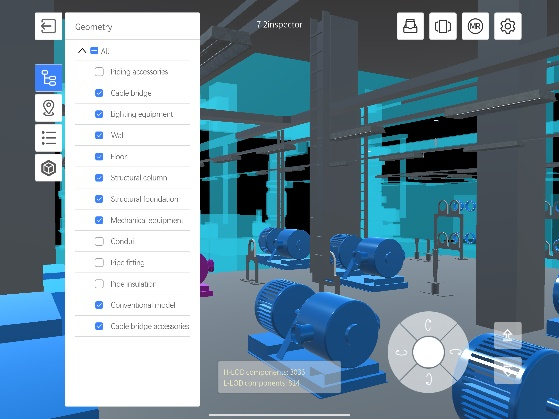
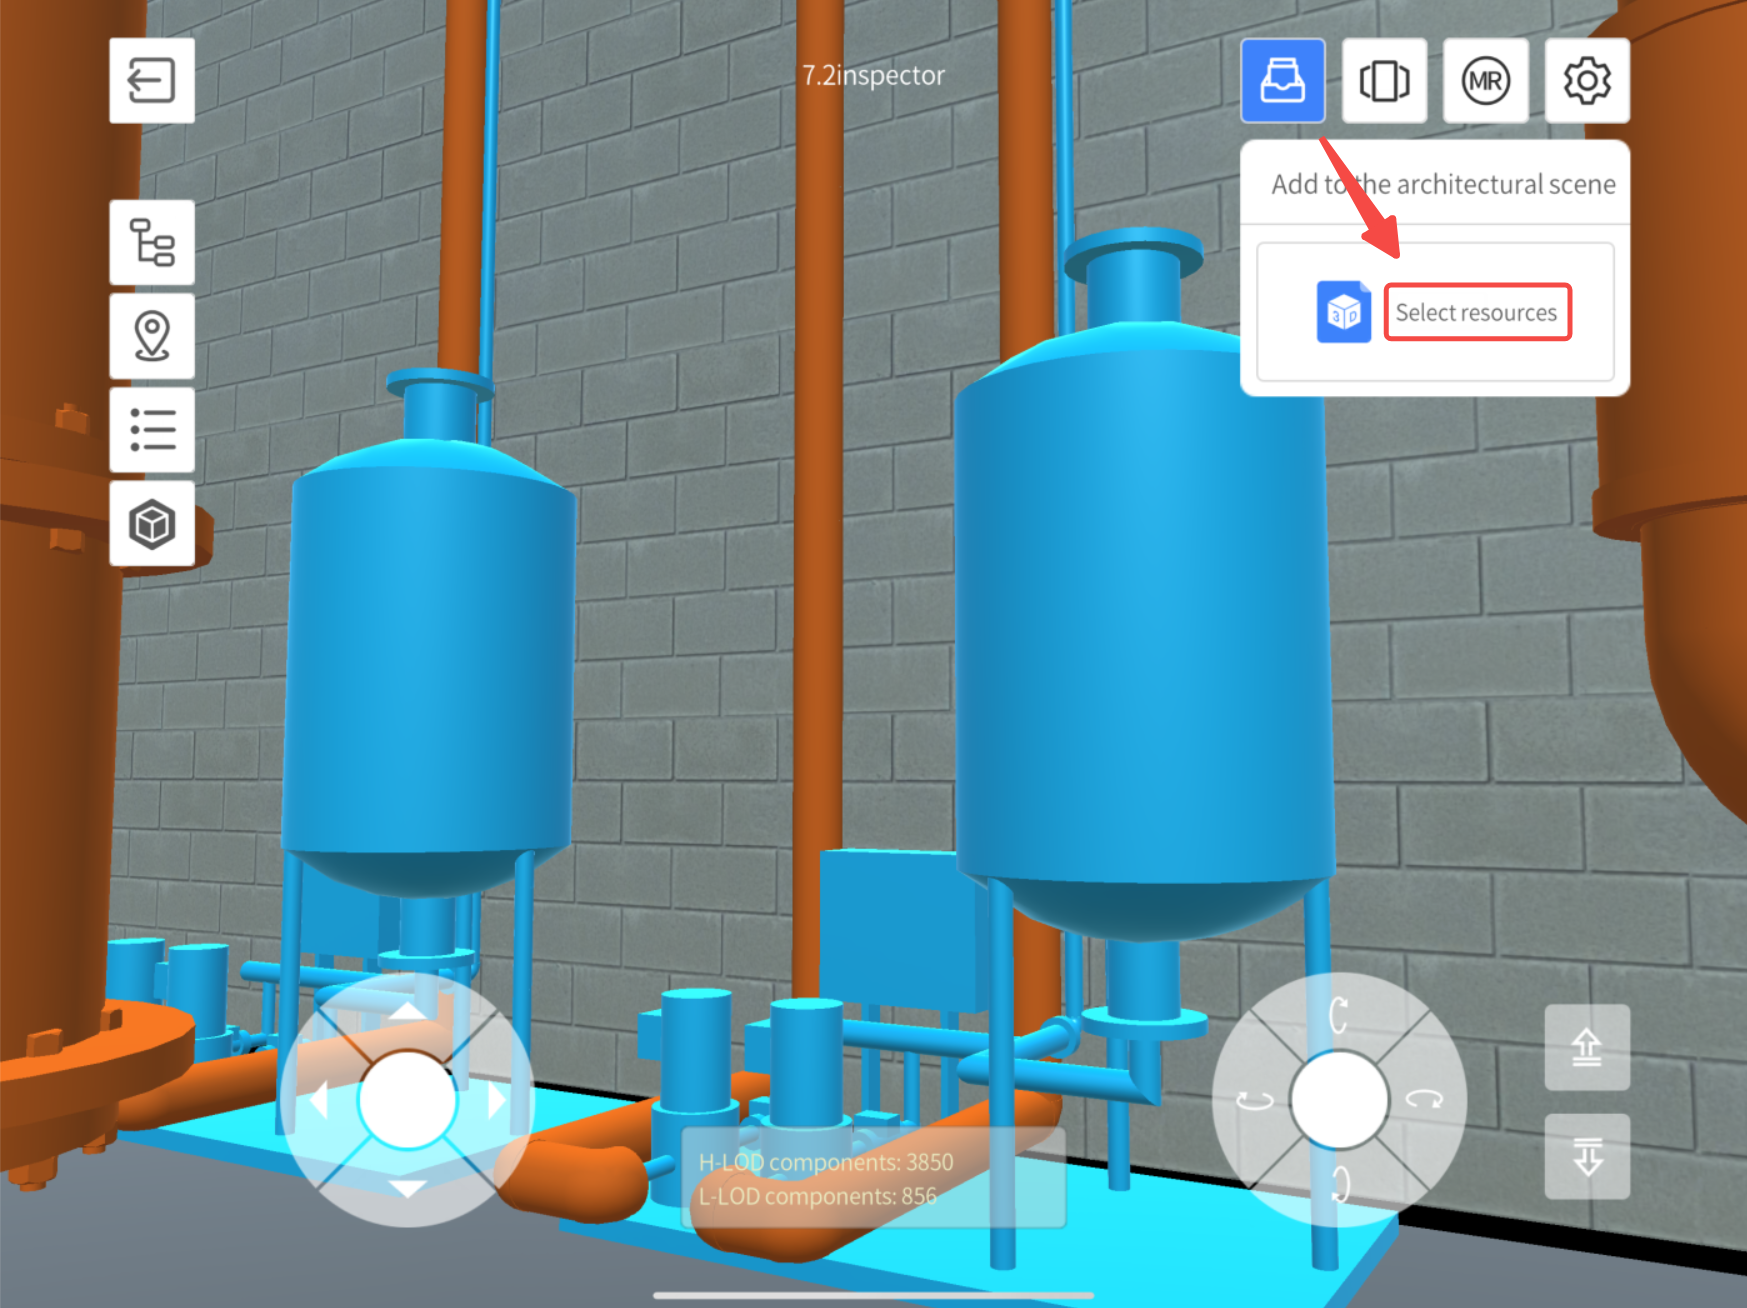
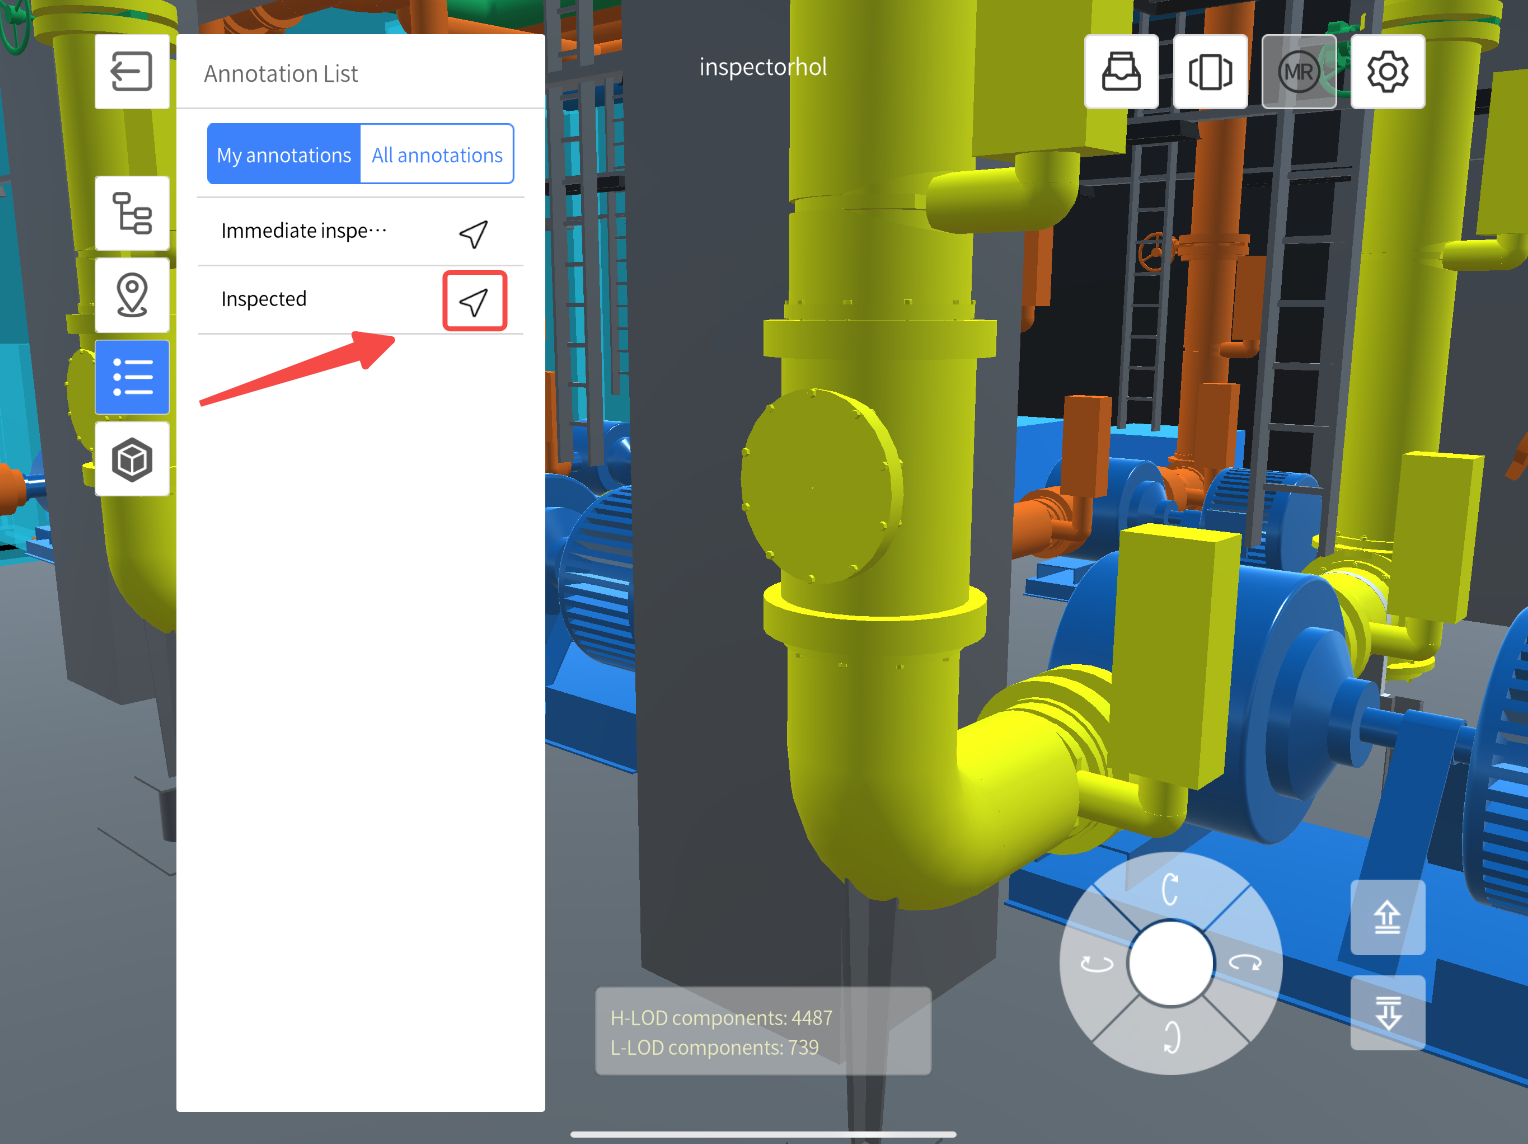
Using DataMesh Inspector, you can quickly navigate through your scenes using markers, add necessary resources, and collaborate seamlessly through annotations. This tool is ideal for applications in industries such as construction supervision and equipment maintenance, helping you improve both efficiency and accuracy.