- How to use a path editing system
- How to use a AGV
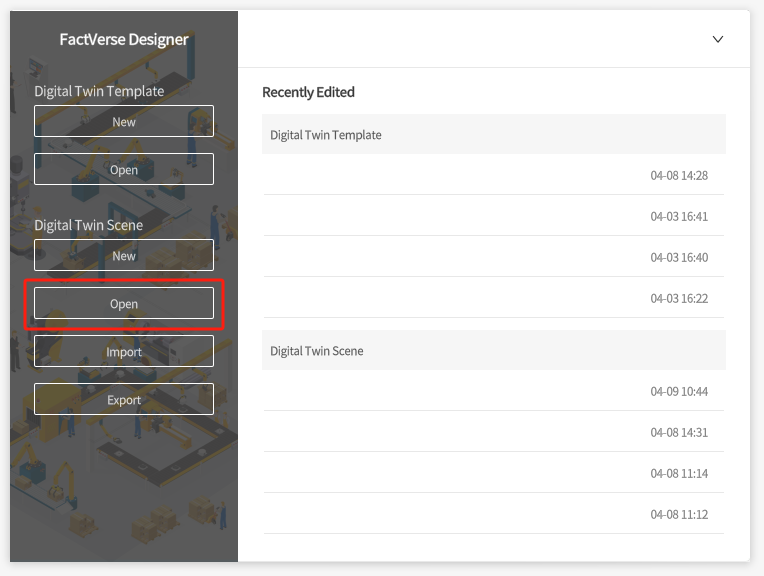
Install the latest version of FactVerse Designer | DataMesh.
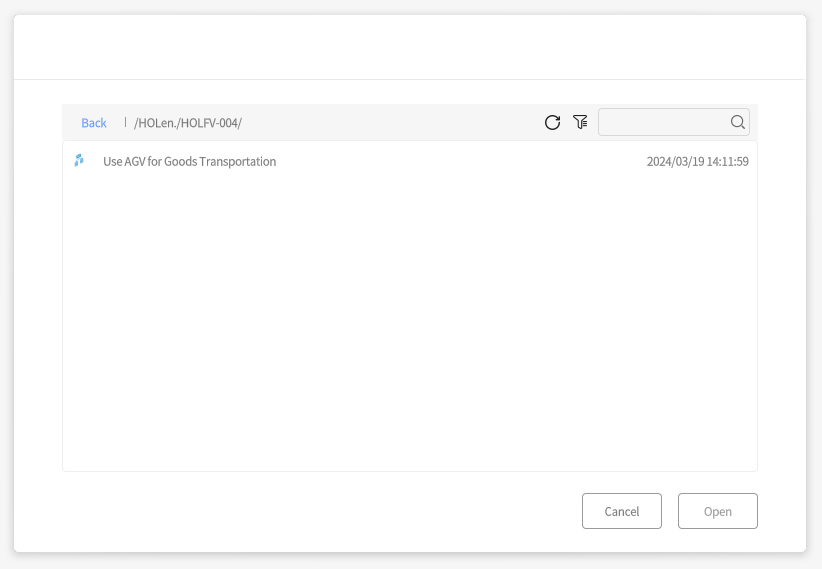
Open FactVerse Designer, log in, then click on Open. Next, navigate to HOLen.-HOLFV-004, find the scene “Use AGV for Goods Transportation” and enter FactVerse Hands-On Lab 04.
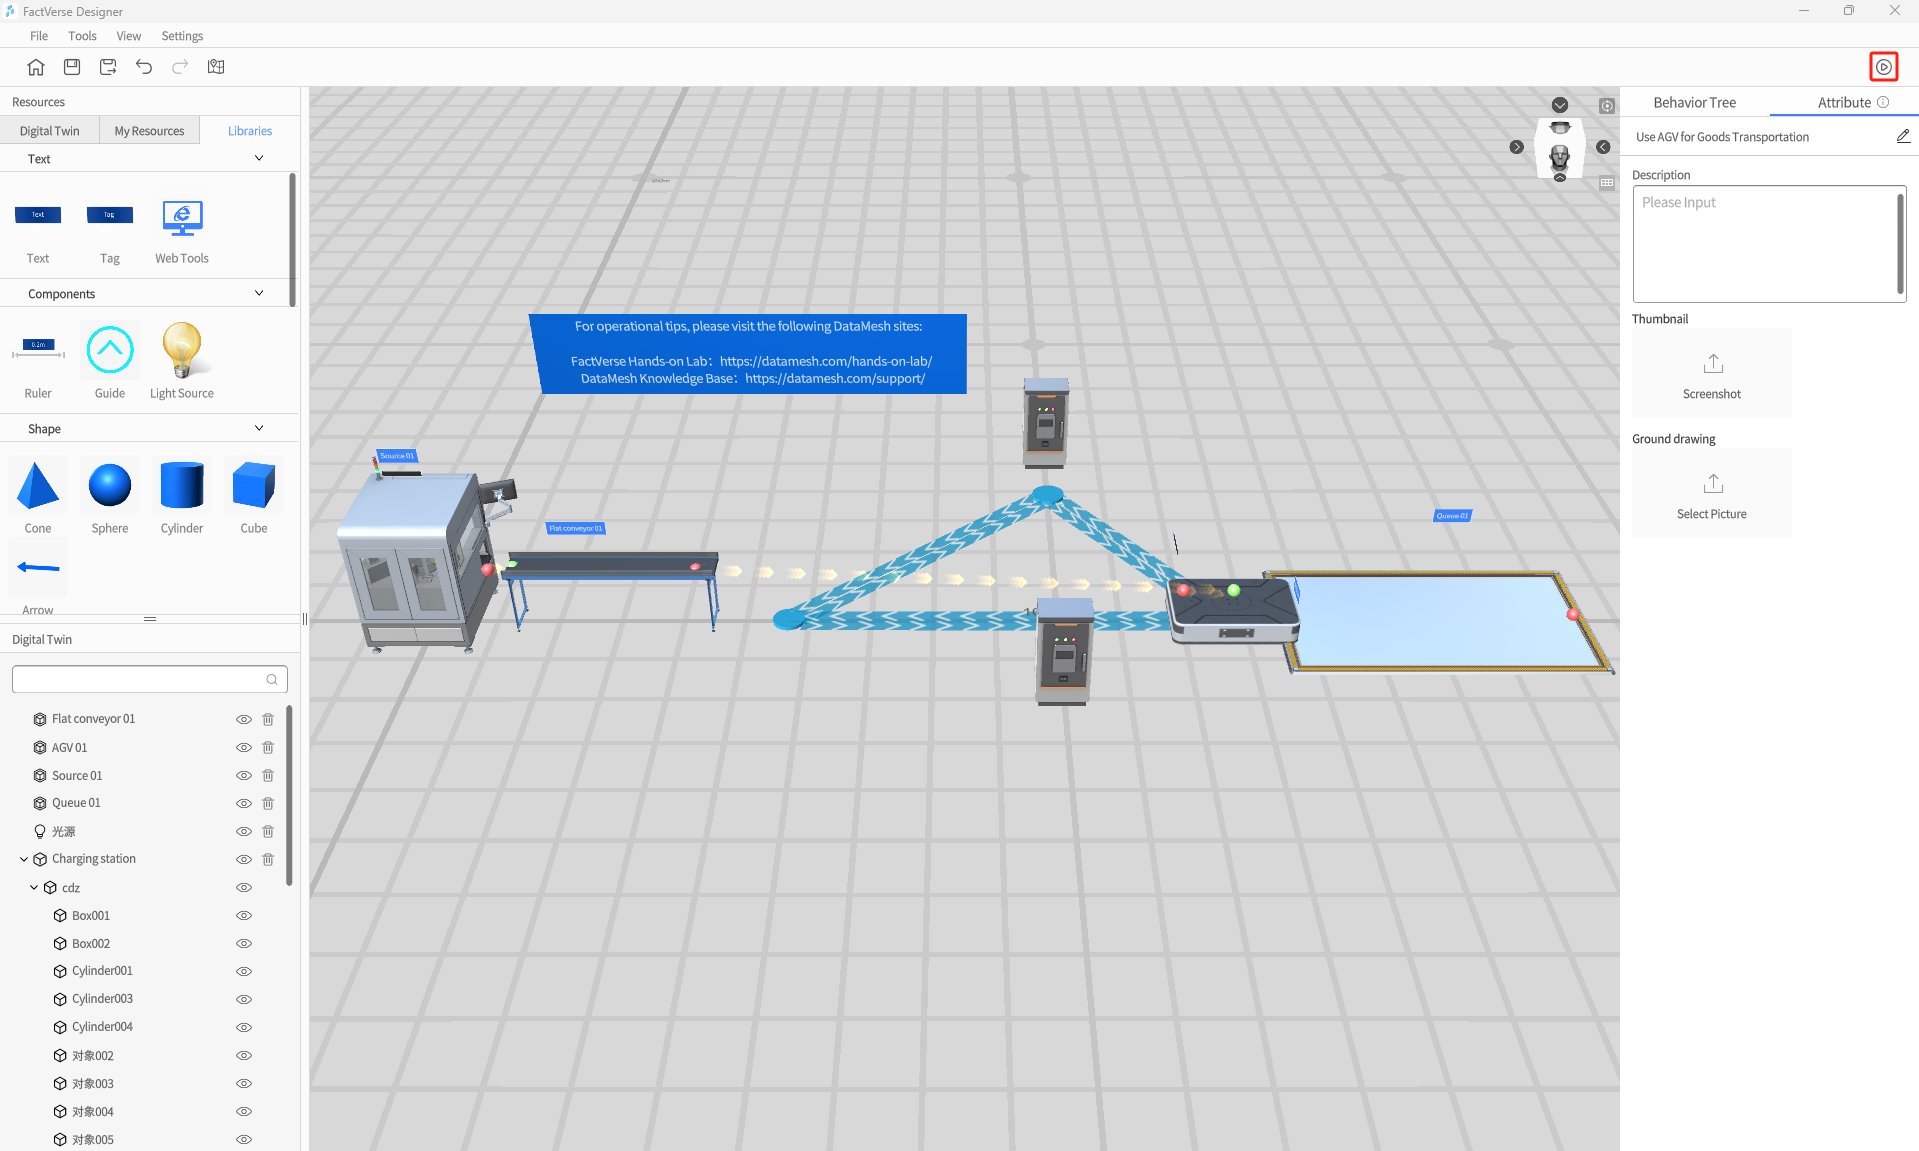
Click the button in the upper right corner of the scene to enter scene preview mode. Here, we can observe the normal operation of the production line.
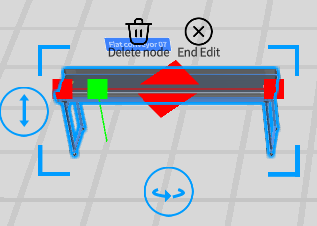
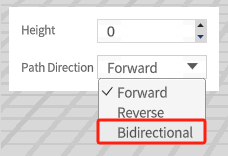
 Select Bidirectional for Path Direction;
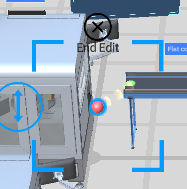
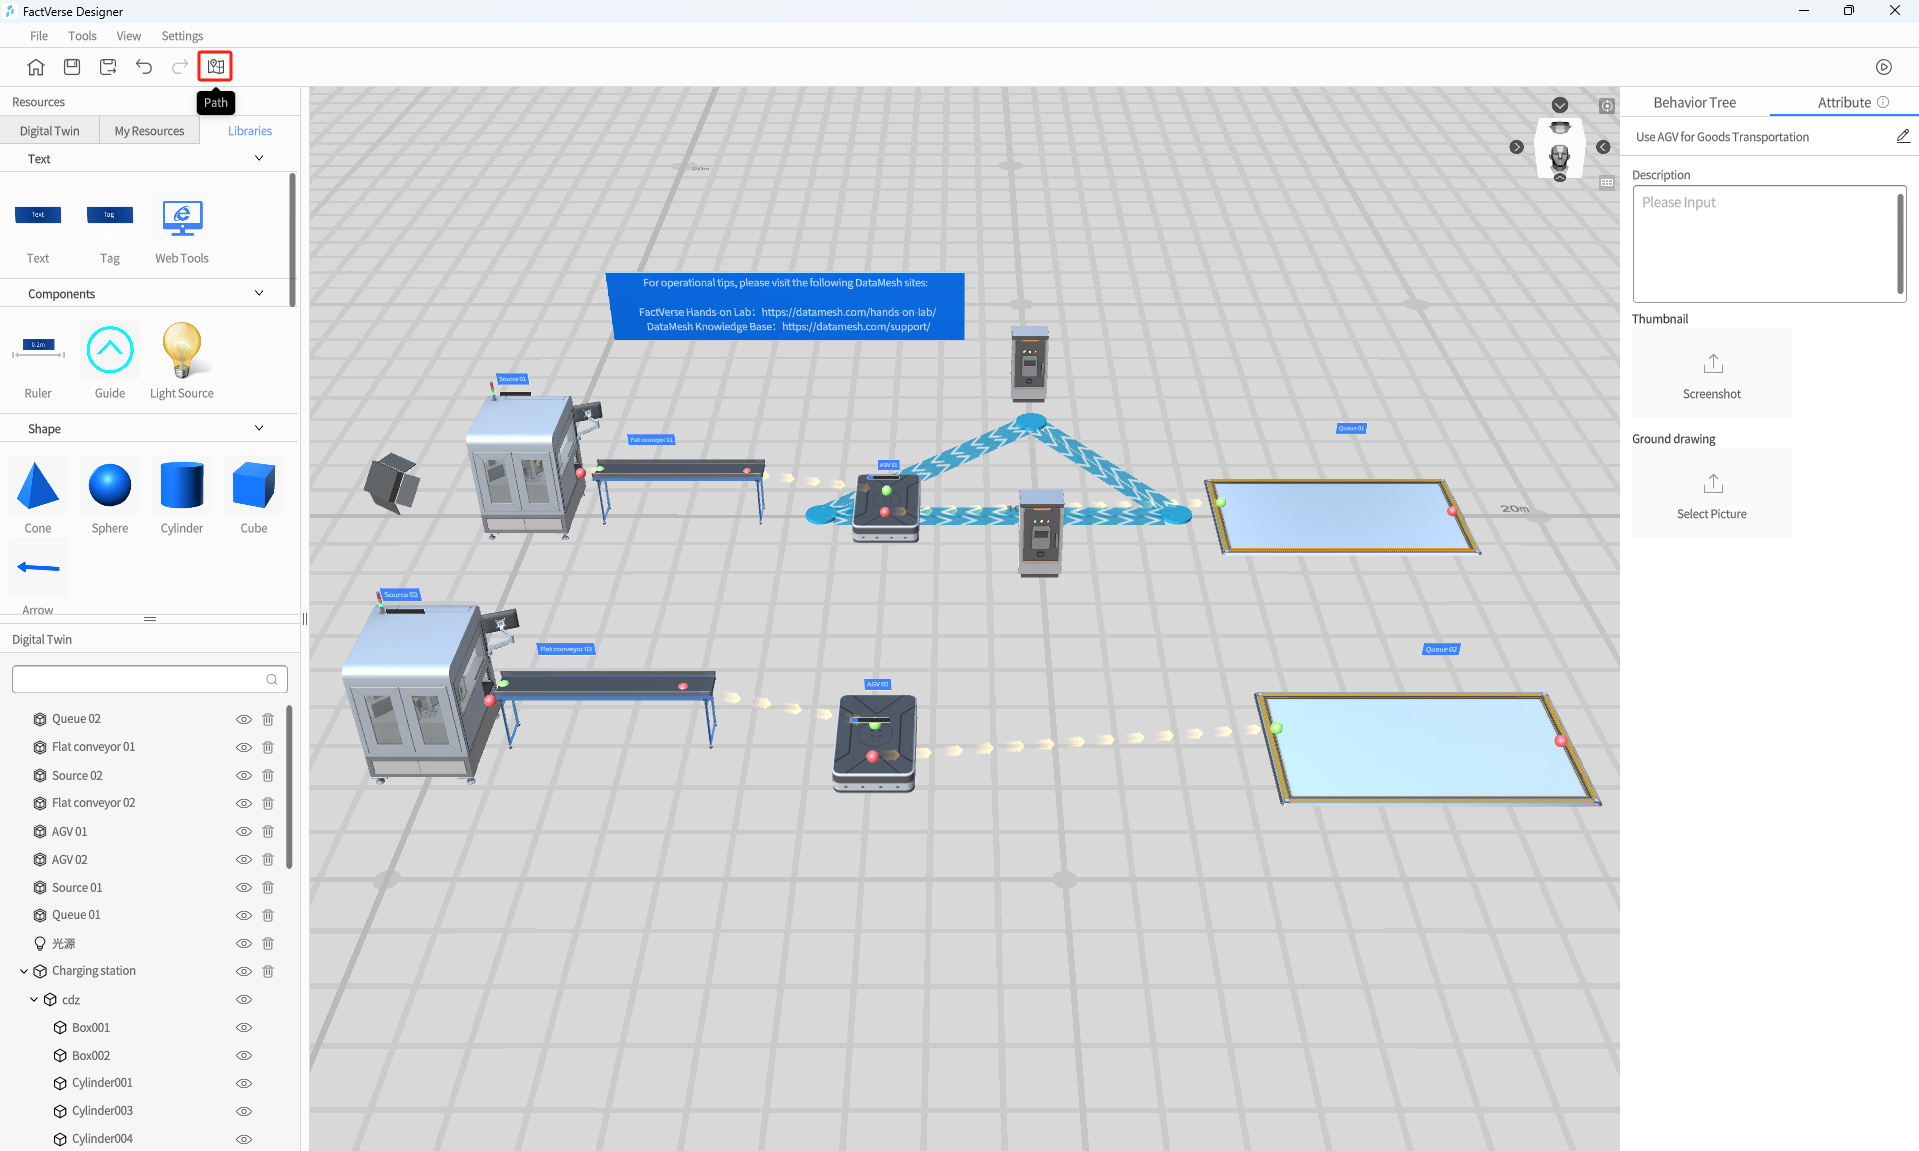
 Click the “path” icon to edit the path;
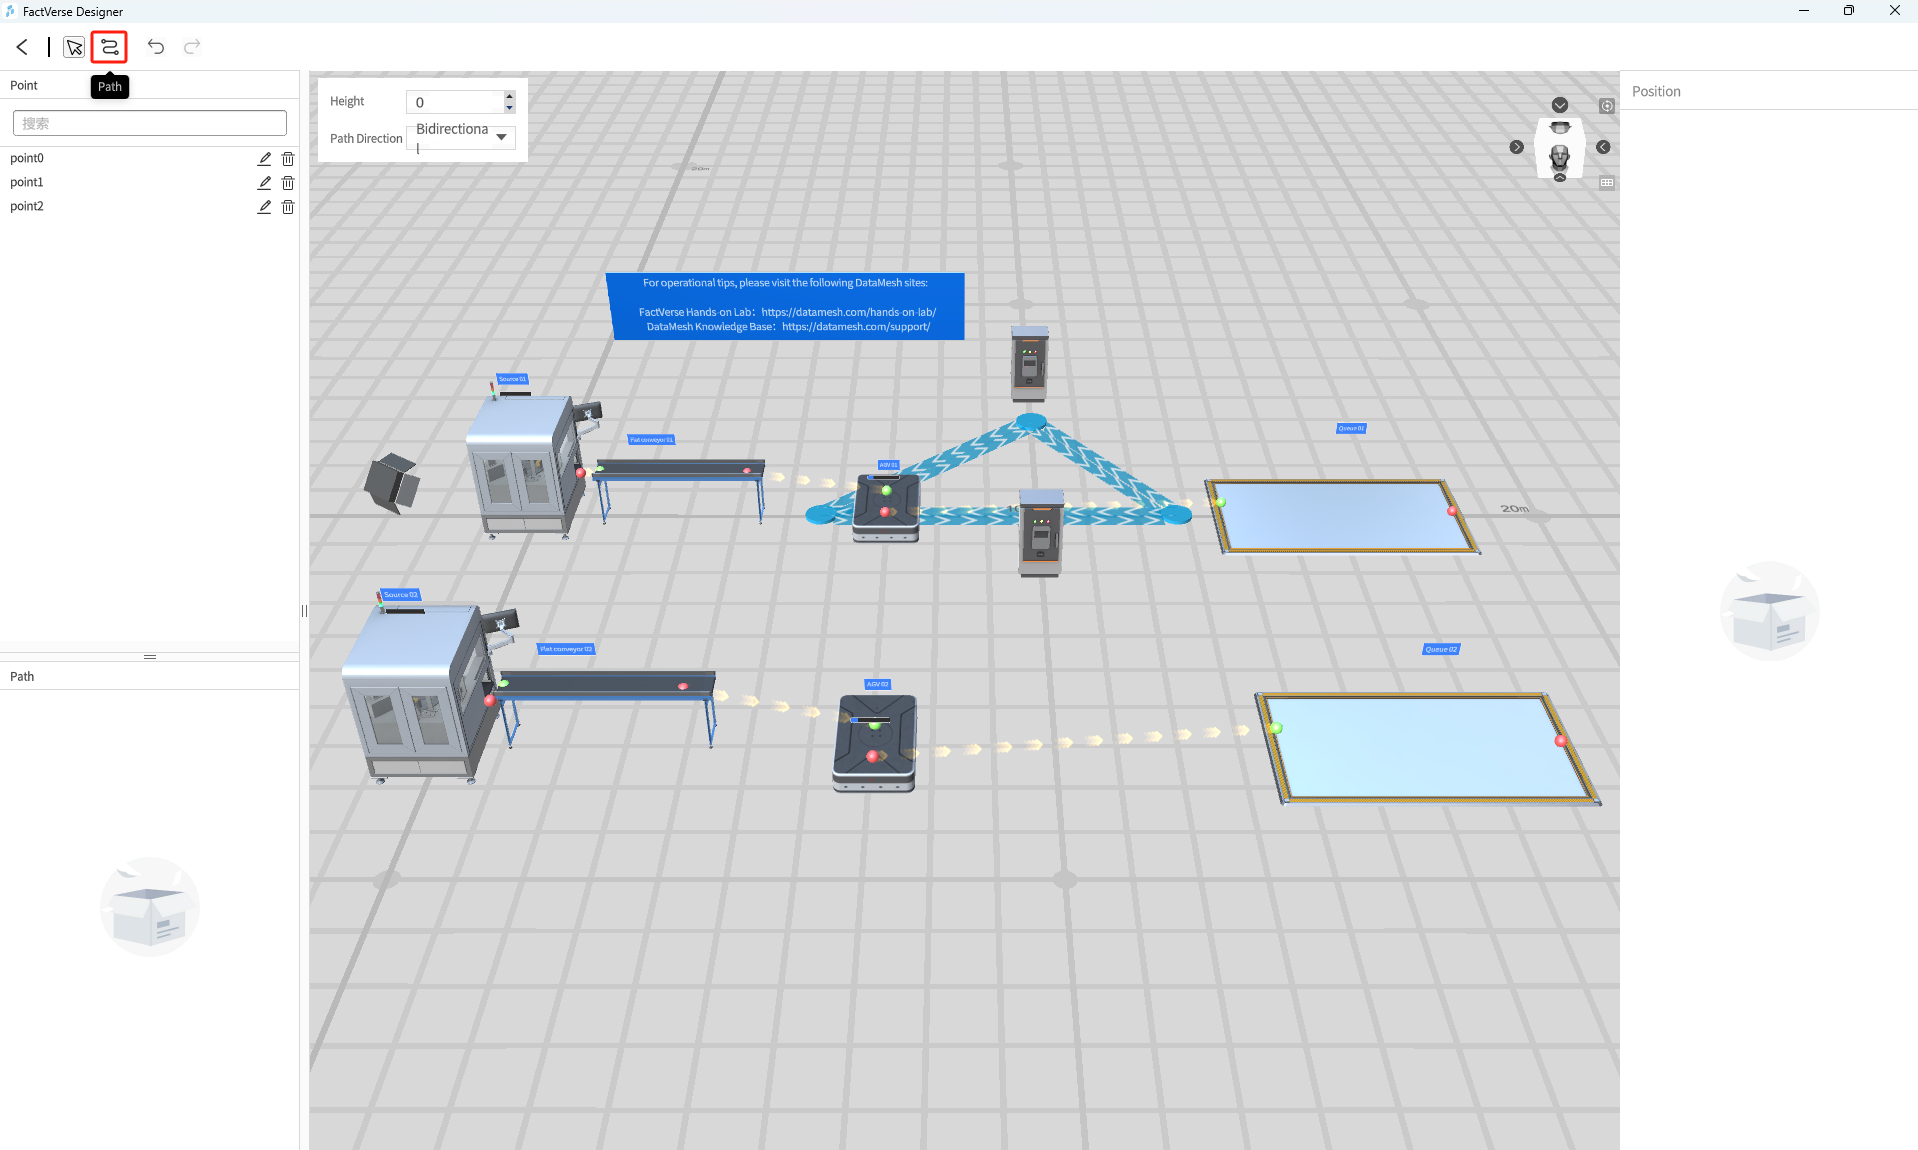 Click the ground in the scene to draw the path;
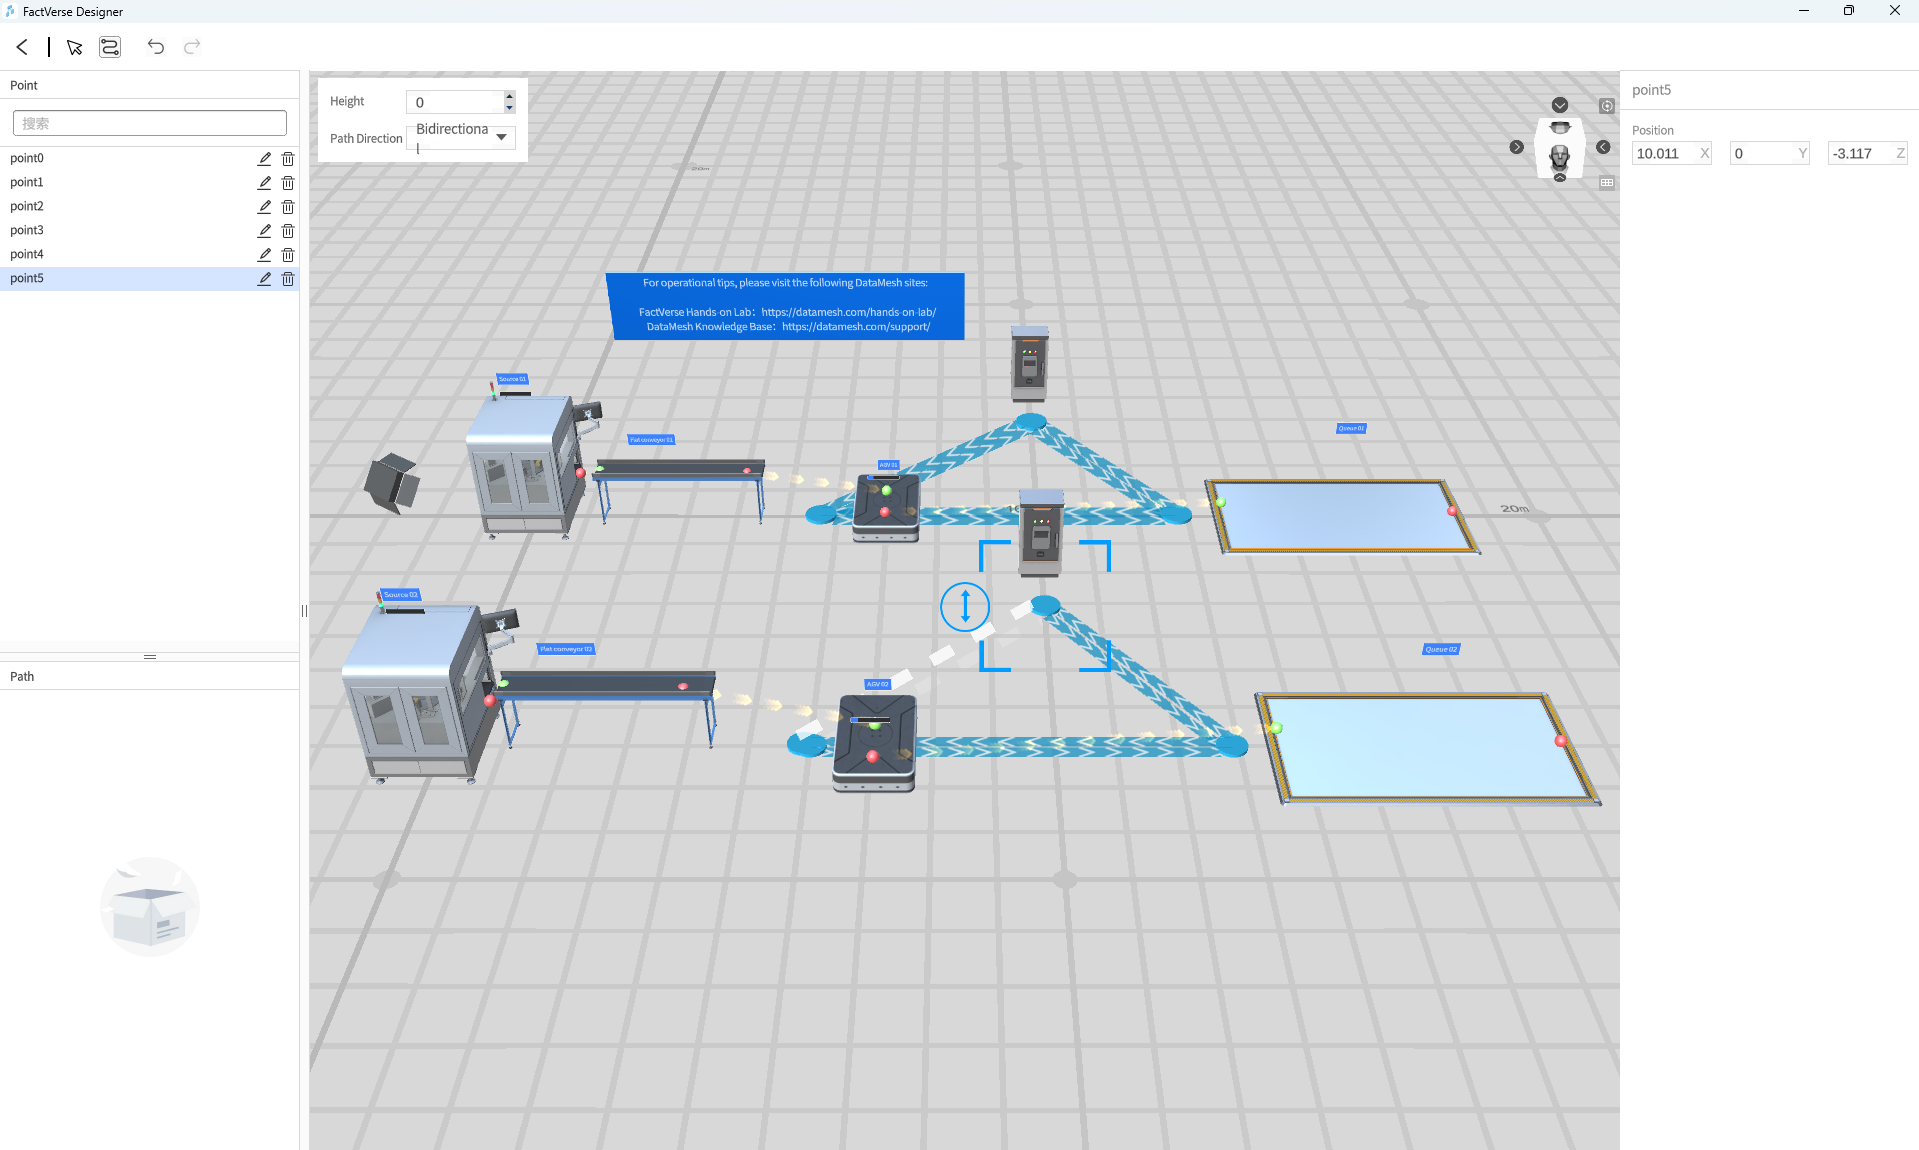 Complete edition;
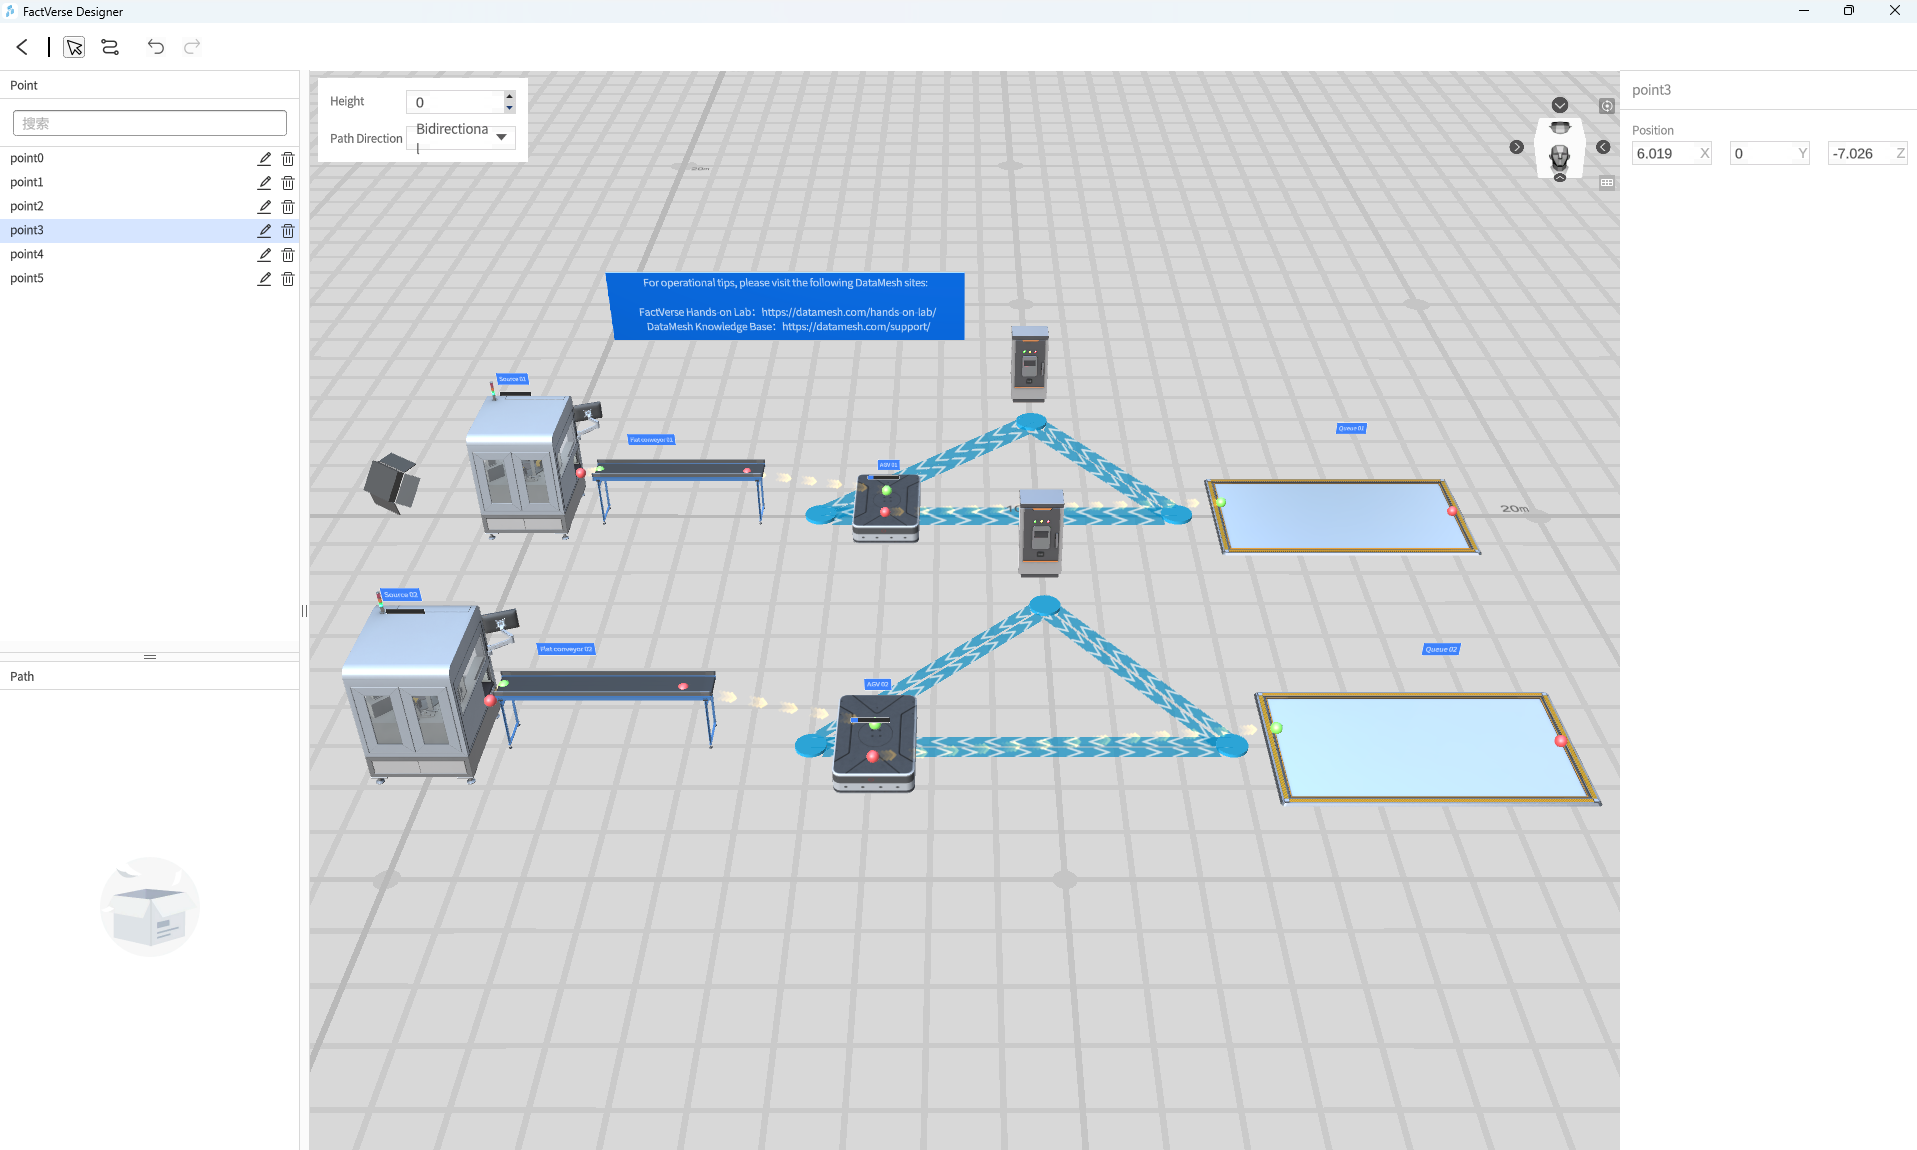 The path editing mode is designed to map out various crucial control points, such as pickup points, drop-off locations, charging stations, and more. Bidirectional paths ensure that the digital twins can shuttle between these points. If the path is set forward, the digital twin can only move from the start point to the endpoint, and vice versa for the backward path. You can adjust the mode, number, and poses of these control points according to actual conditions.
With these steps completed, a new product line has been successfully set up.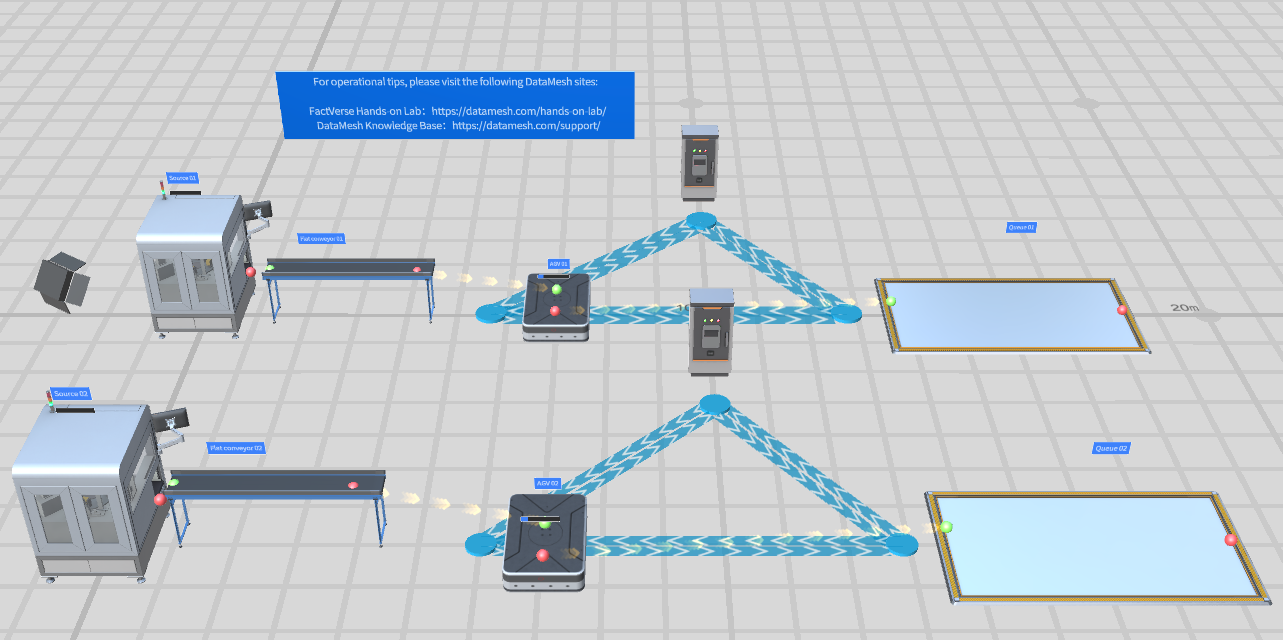
Once all the above steps are completed, click the preview button again in the top right corner to see the newly built product line.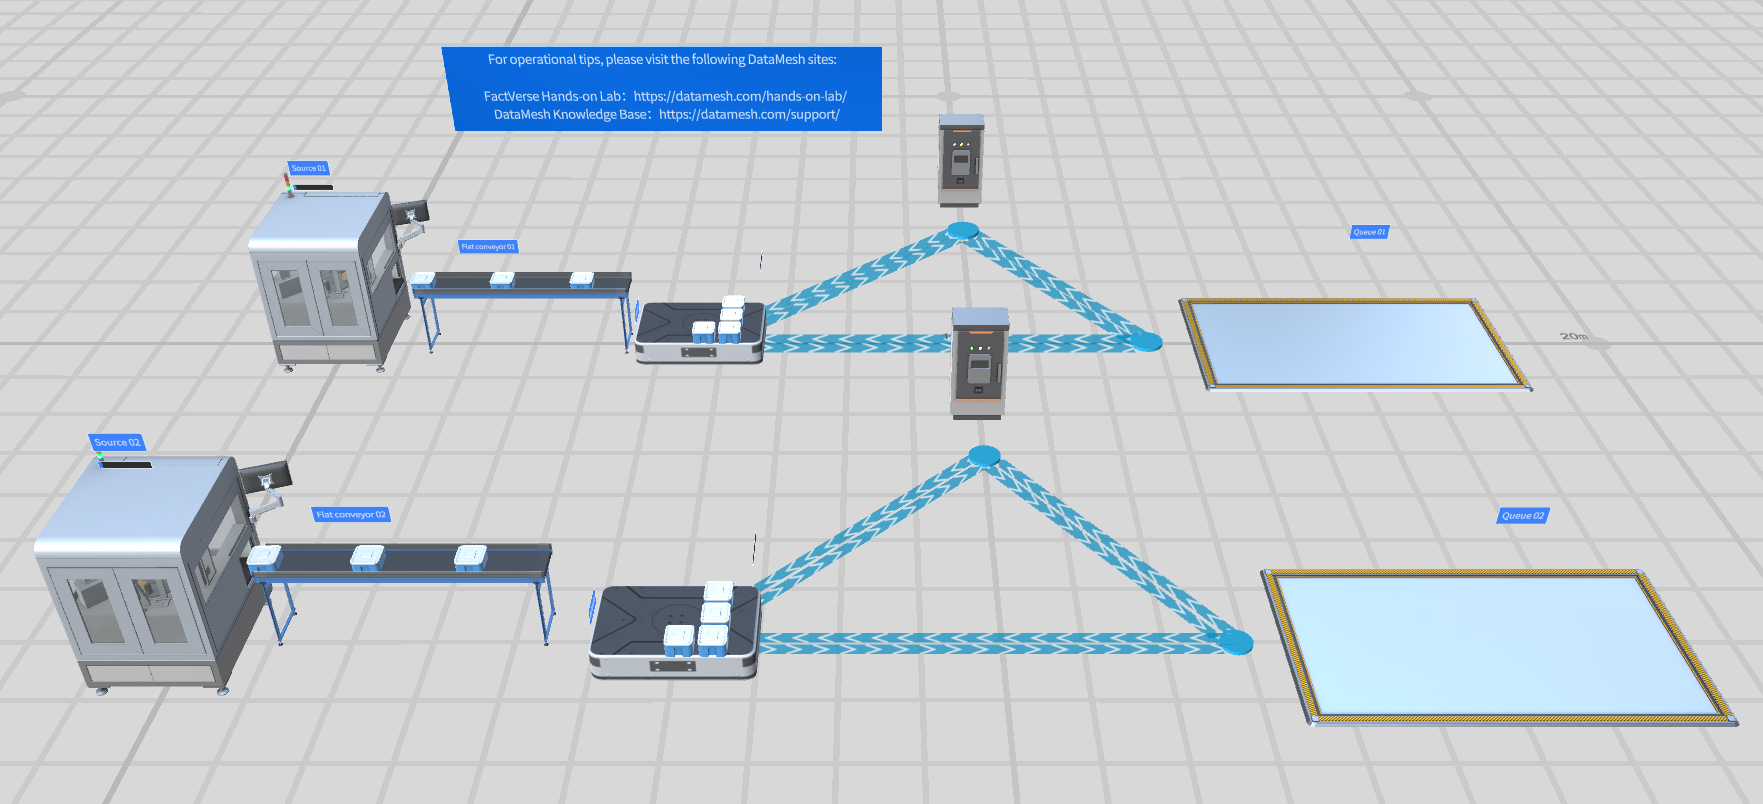
So far, we've covered all the content from Designer Hands-on Lab 4 teaching.